EasyAutoRig Tutorial
EasyAutoRig Detailed User Guide
1. What Is EasyAutoRig?
EasyAutoRig is a humanoid character auto-rigging tool for Unreal Engine.
Its goal is to take a compatible humanoid Static Mesh and quickly generate a rigging result that follows the UE5 standard humanoid skeleton conventions, including:
- A fitted humanoid Skeleton
- Skeletal Mesh
- Automatic skin weights
- Optional Physics Asset
- UE5-style helper bones, Twist bones, and IK bones
When using EasyAutoRig, you do not need to manually create a complete skeleton in DCC software such as Blender or Maya first.
The basic workflow can be summarized as:
Import a Static Mesh → Place humanoid Landmarks → Adjust Joint Centers → Validate → Rig → Get a Skeletal Mesh
1.1 EasyAutoRig’s Role: Help You Rig Faster, Not Replace All Manual Refinement
Before you start, there is one important point to make clear:
EasyAutoRig is not intended to promise perfect, production-ready skin weights for every character with a single click.
Automatic rigging and automatic skinning are better understood as a high-quality starting point.
EasyAutoRig is designed to save you from a large amount of repetitive and time-consuming setup work, such as:
- Building a UE5-style humanoid skeleton from scratch
- Setting up Twist, IK, and helper bones
- Generating an initial set of skin weights
- Generating a Physics Asset
- Checking whether the model is suitable for the current rigging workflow before the final Rig
This lets you get a Static Mesh character into animation testing and Gameplay prototyping inside Unreal Engine much faster, instead of spending most of your time on basic rigging work first.
Different characters can have very different topology, body proportions, clothing, hair, skirts, and detached components, so the final quality of automatic skinning will also vary.
Some models may already be good enough for prototyping and general animation tests after generation. Others may still need manual refinement around areas such as the shoulders, elbows, hips, knees, fingers, or clothing.
A better way to think about the EasyAutoRig workflow is:
Quickly create the skeleton and initial skinning → Test animation and gameplay as early as possible → Manually refine only the areas that actually need it
rather than:
Click once → Every model gets final weights that never need inspection
If your project requires high-quality character deformation, you should still test the character with real animations after Rig and adjust Skin Weights where necessary.
2. Before You Start: What Requirements Must the Model Meet?
EasyAutoRig is currently designed mainly for standard, symmetrical humanoid characters.
The recommended input model should meet the following requirements:
- Humanoid character
- T Pose or A Pose
- Left and right sides are approximately symmetrical
- The character faces world
+Y - World
+Zis Up - The left/right center of the body is at
X = 0 - The main body is located near the model’s local origin
- Arms and legs are not obviously crossed
- The model is not in an arbitrary pose such as sitting, running, or a combat pose
3. The Model Does Not Need to Be a Nude Base Mesh
The character can include:
- Clothing
- Shoes
- Hair
- Skirts
- Capes
- Tails
- Accessories
- Multiple independent Mesh Components
However, the more complex the model structure is, the fewer regions may be reliably recognized by the automatic semantic skinning system.
EasyAutoRig will choose different skinning methods based on the actual model.
Therefore:
Being able to Rig does not mean every model will use exactly the same automatic skinning algorithm, nor does it mean every model will achieve exactly the same skin-weight quality.
This is expected behavior.
For relatively standard humanoid models, EasyAutoRig will try to use the full semantic skinning workflow. If the model structure is not suitable for full semantic skinning, it can use the UE Geodesic Voxel compatibility route instead.
Regardless of which automatic skinning route is used, you should still test the main deformation areas with actual animations, especially the shoulders, elbows, hips, and knees. If a local area is not good enough, you can manually refine only that part of the weights.
4. Tutorial
4.1 Create an EasyAutoRig Asset
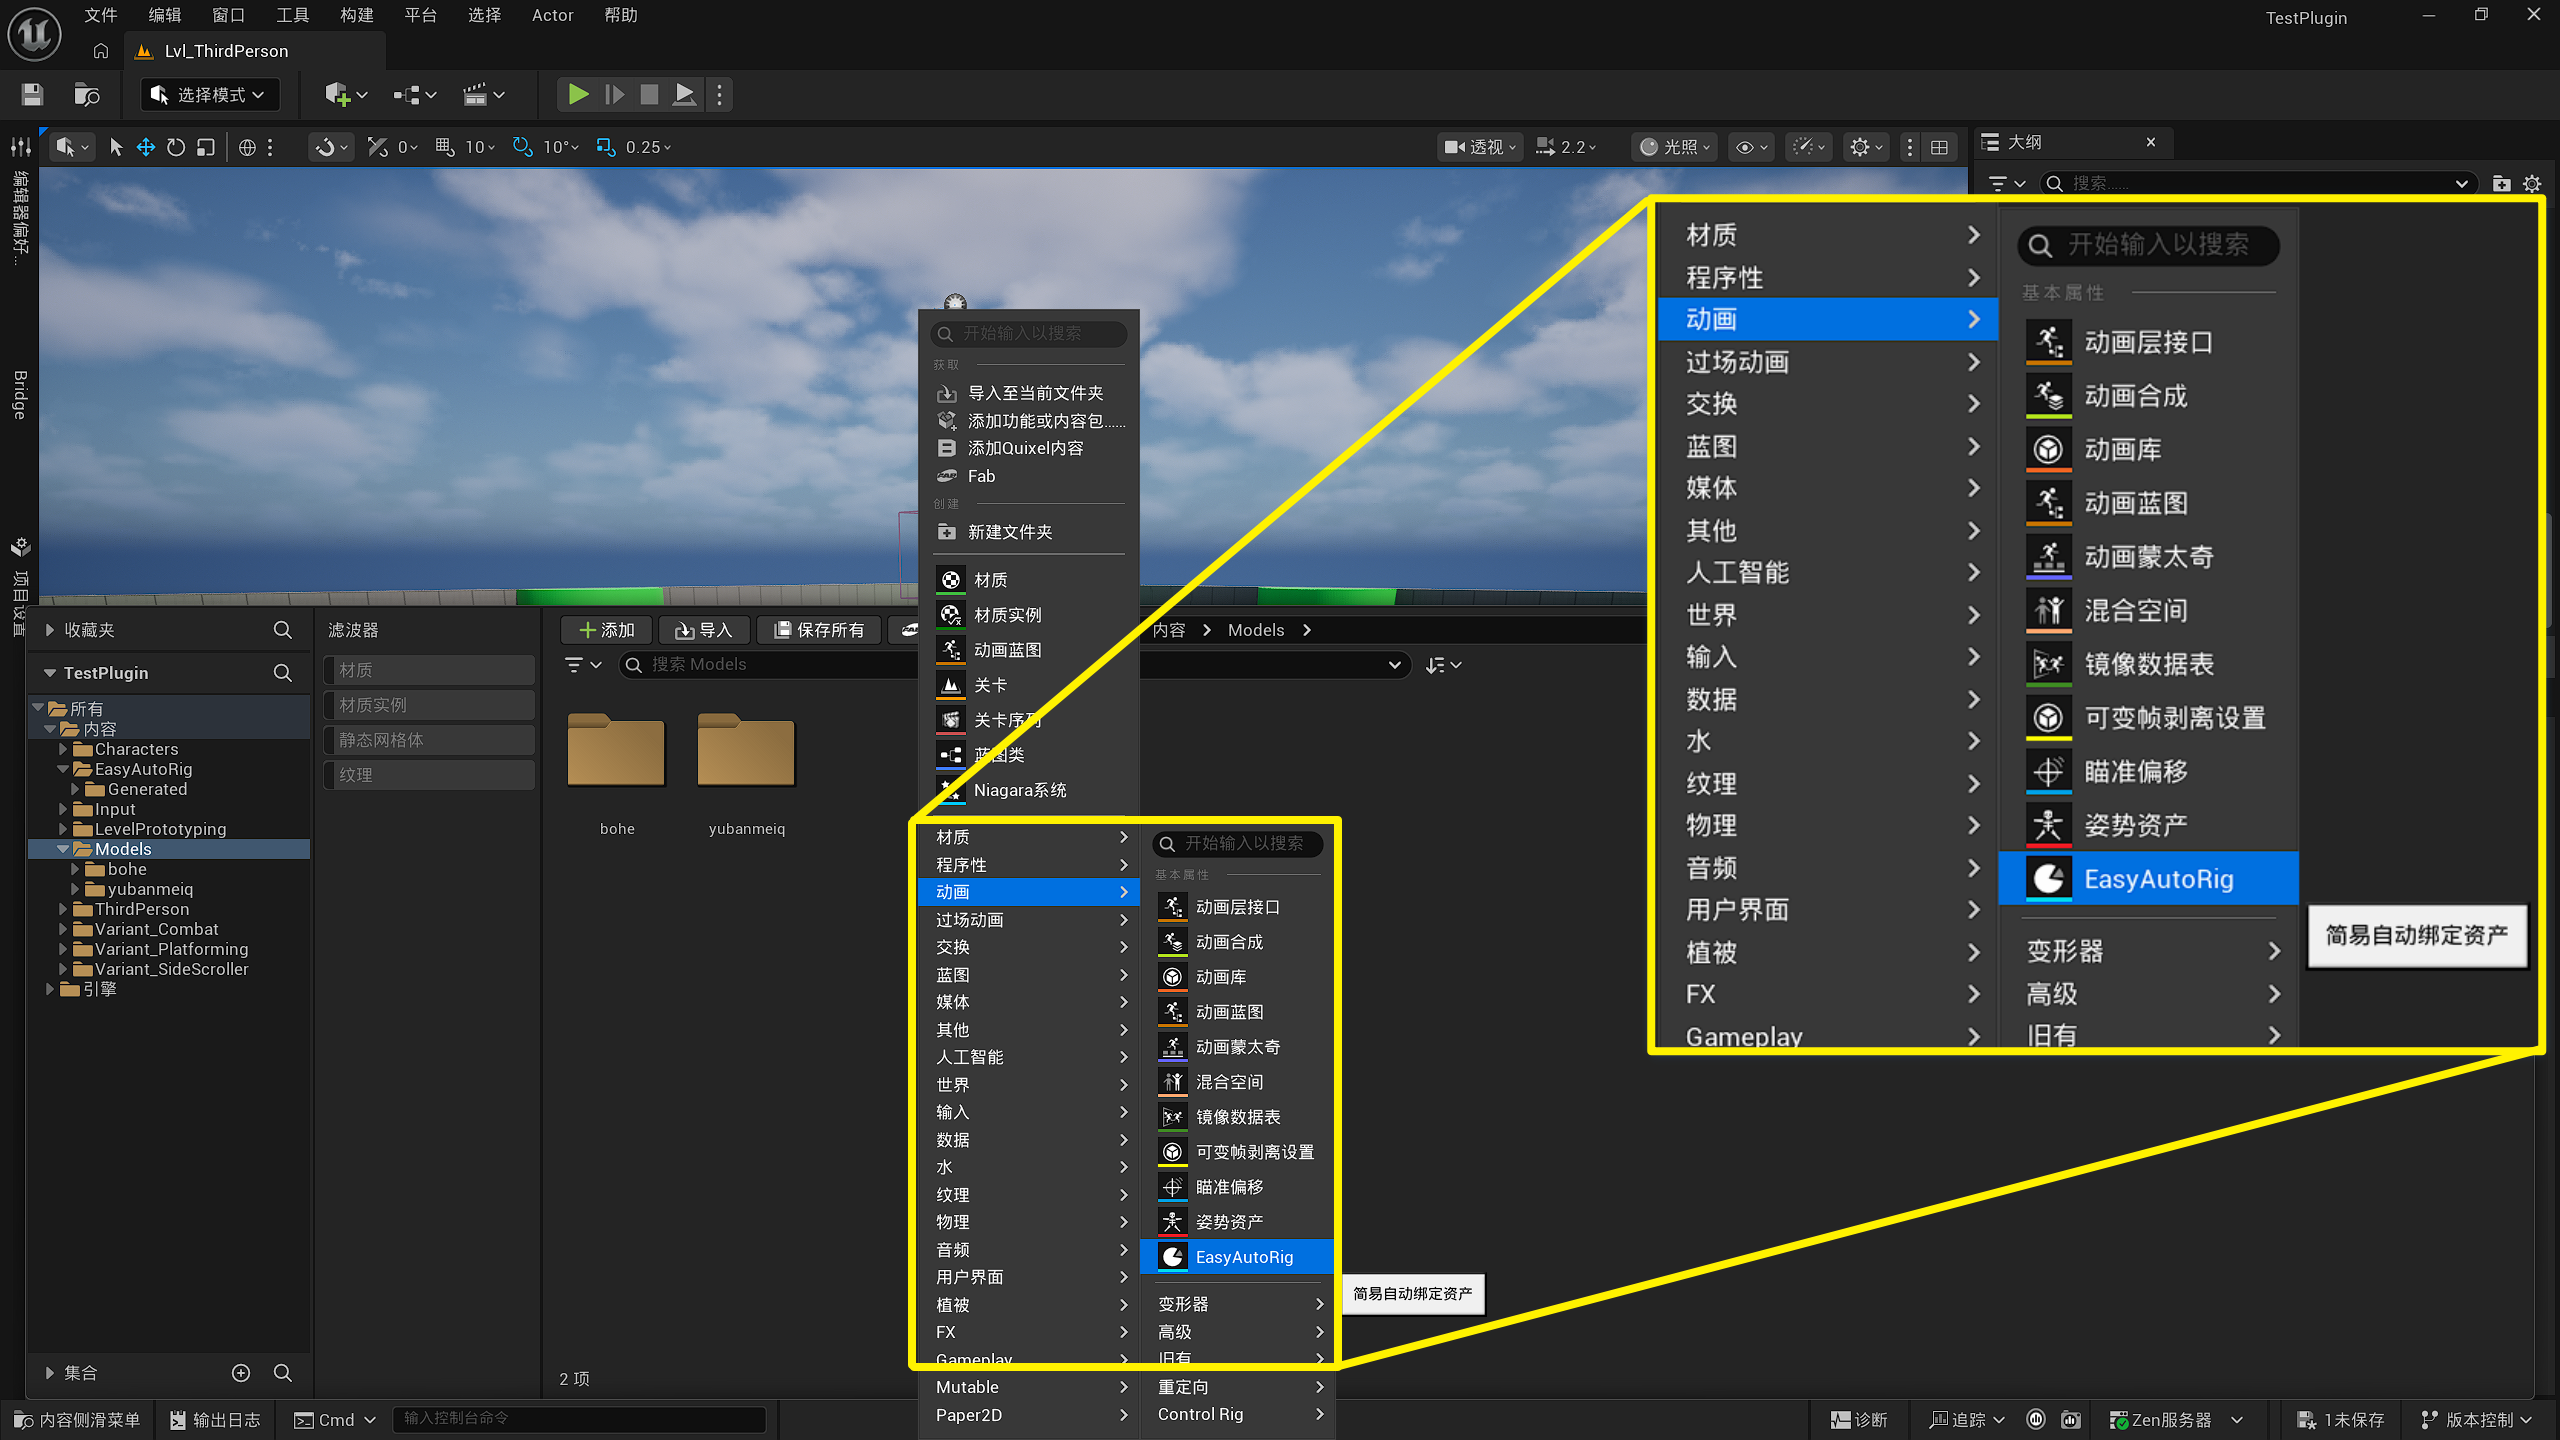
In the Content Browser, right-click and select Animation → EasyAutoRig to create an EasyAutoRig Asset.
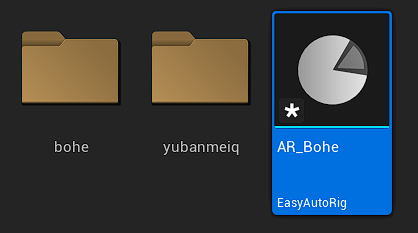
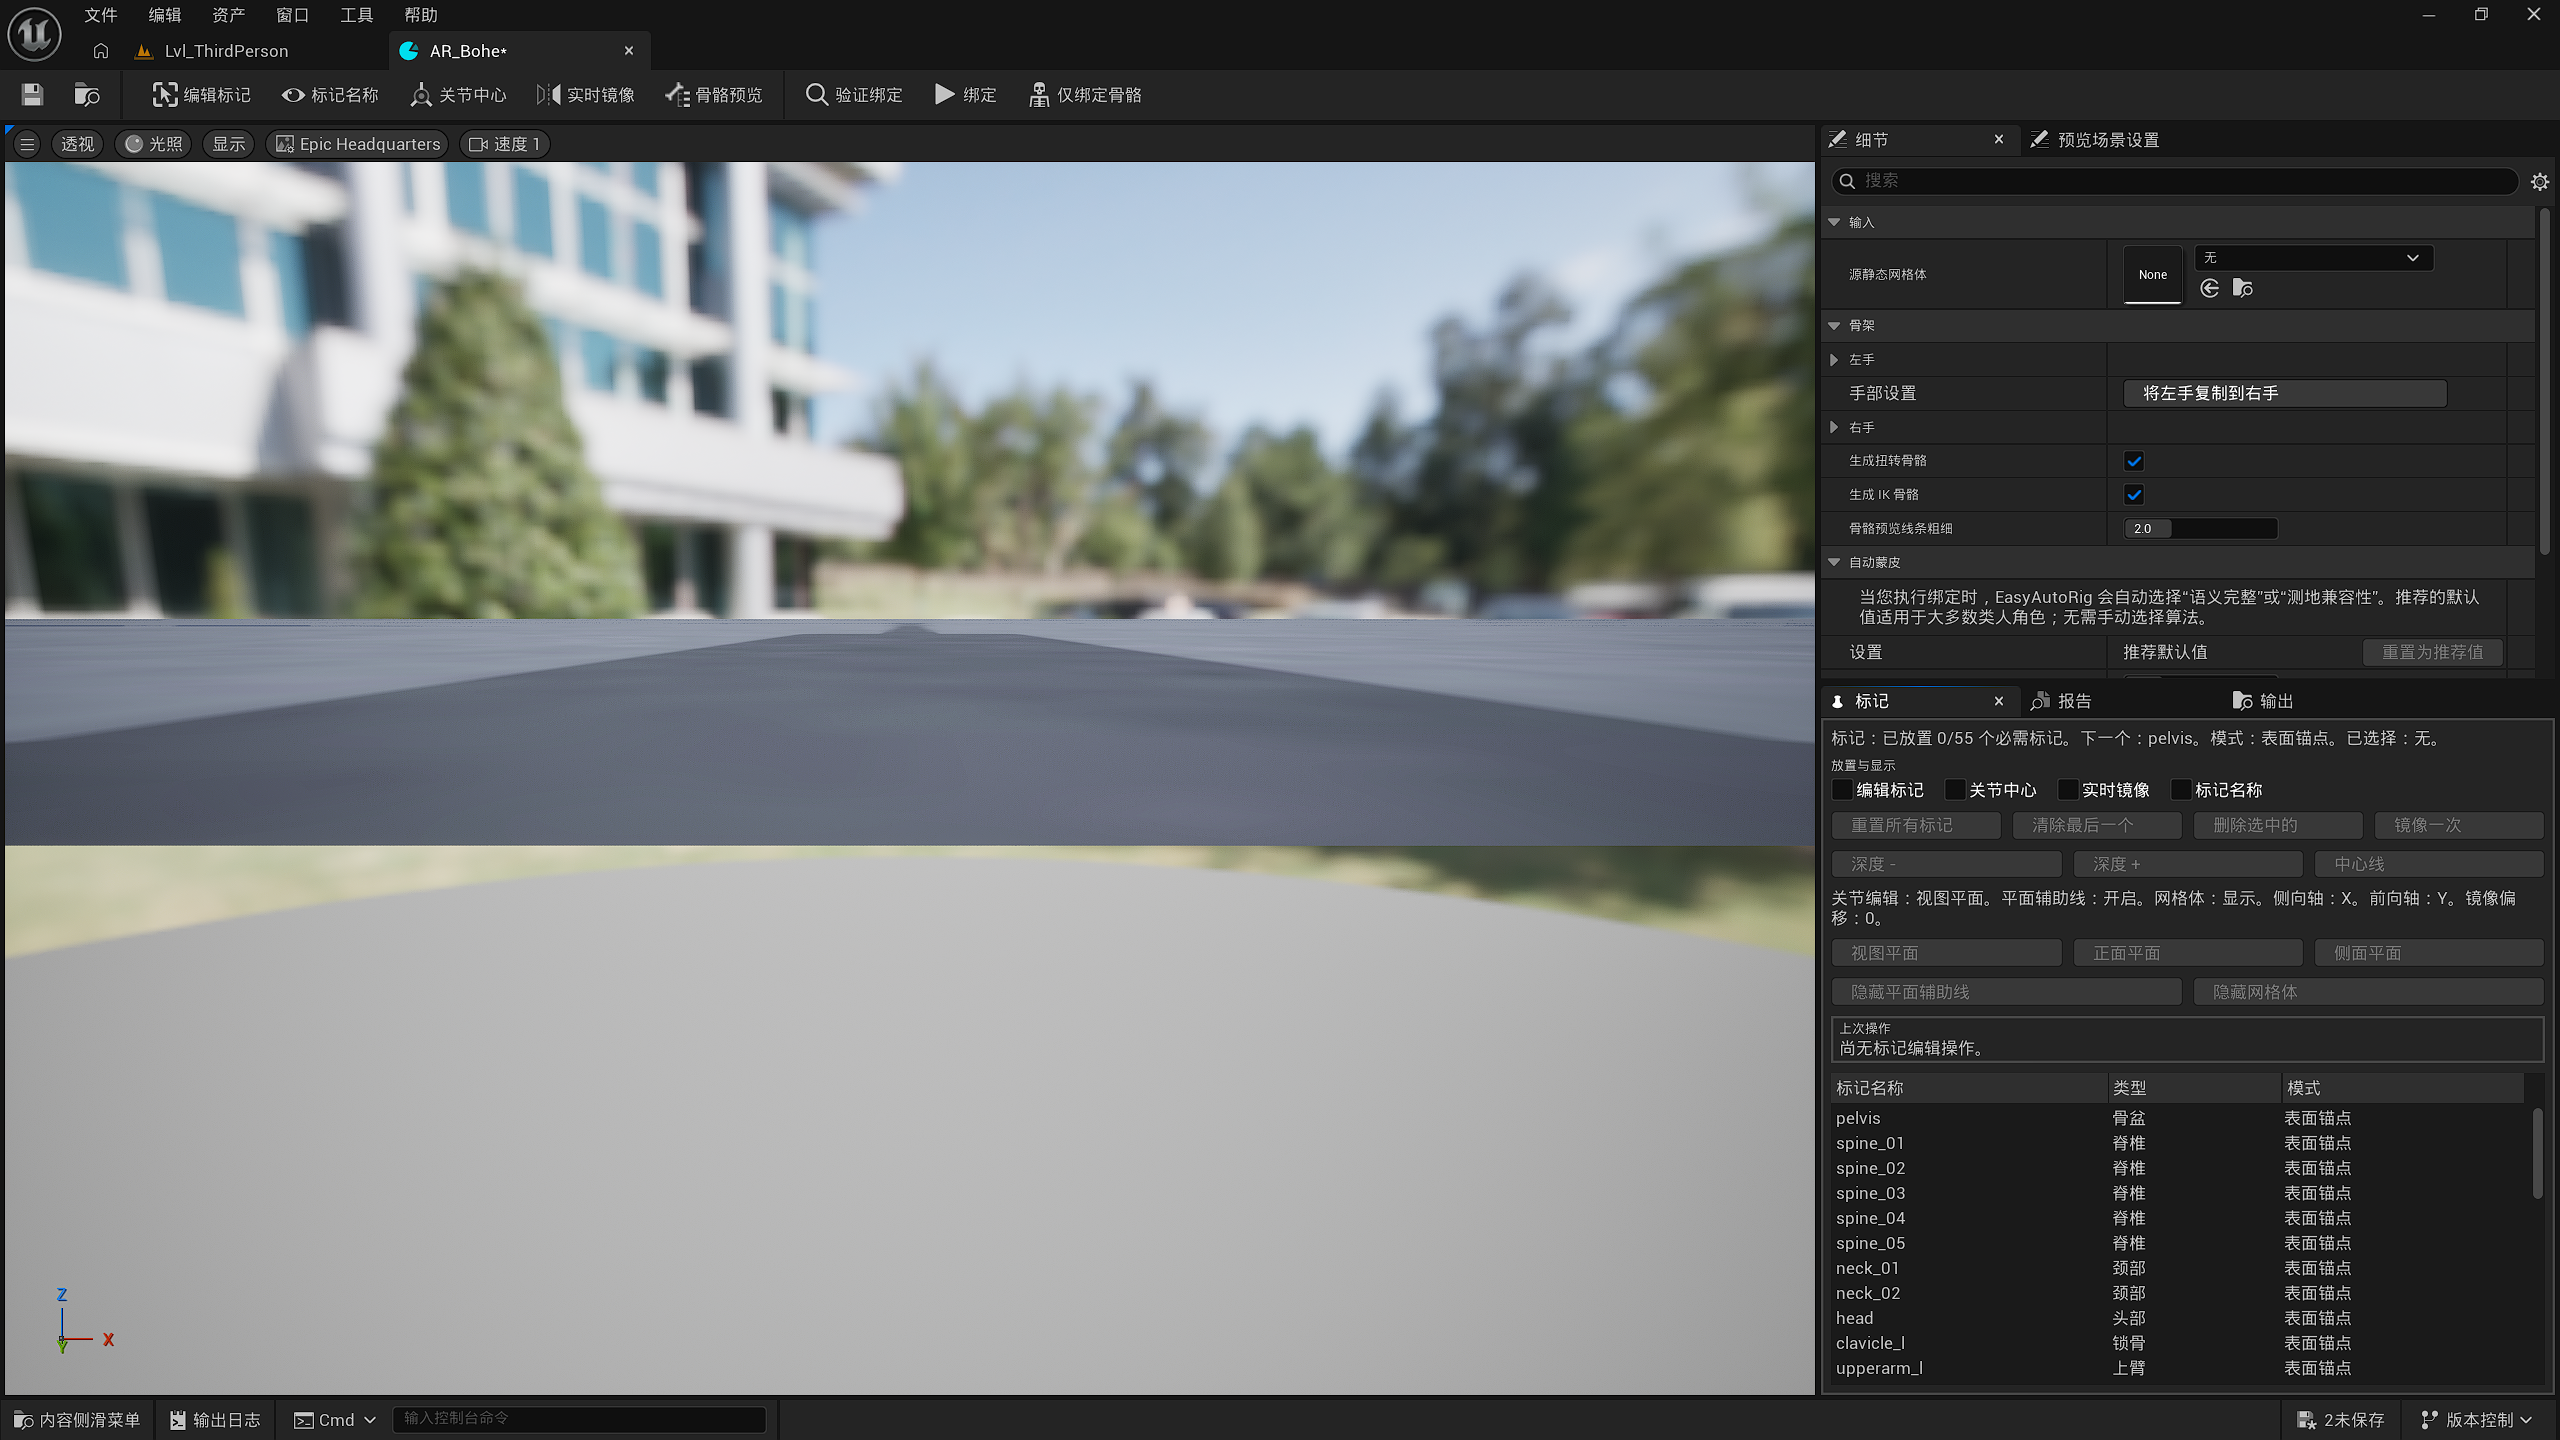
Rename the asset, then double-click it to open it.
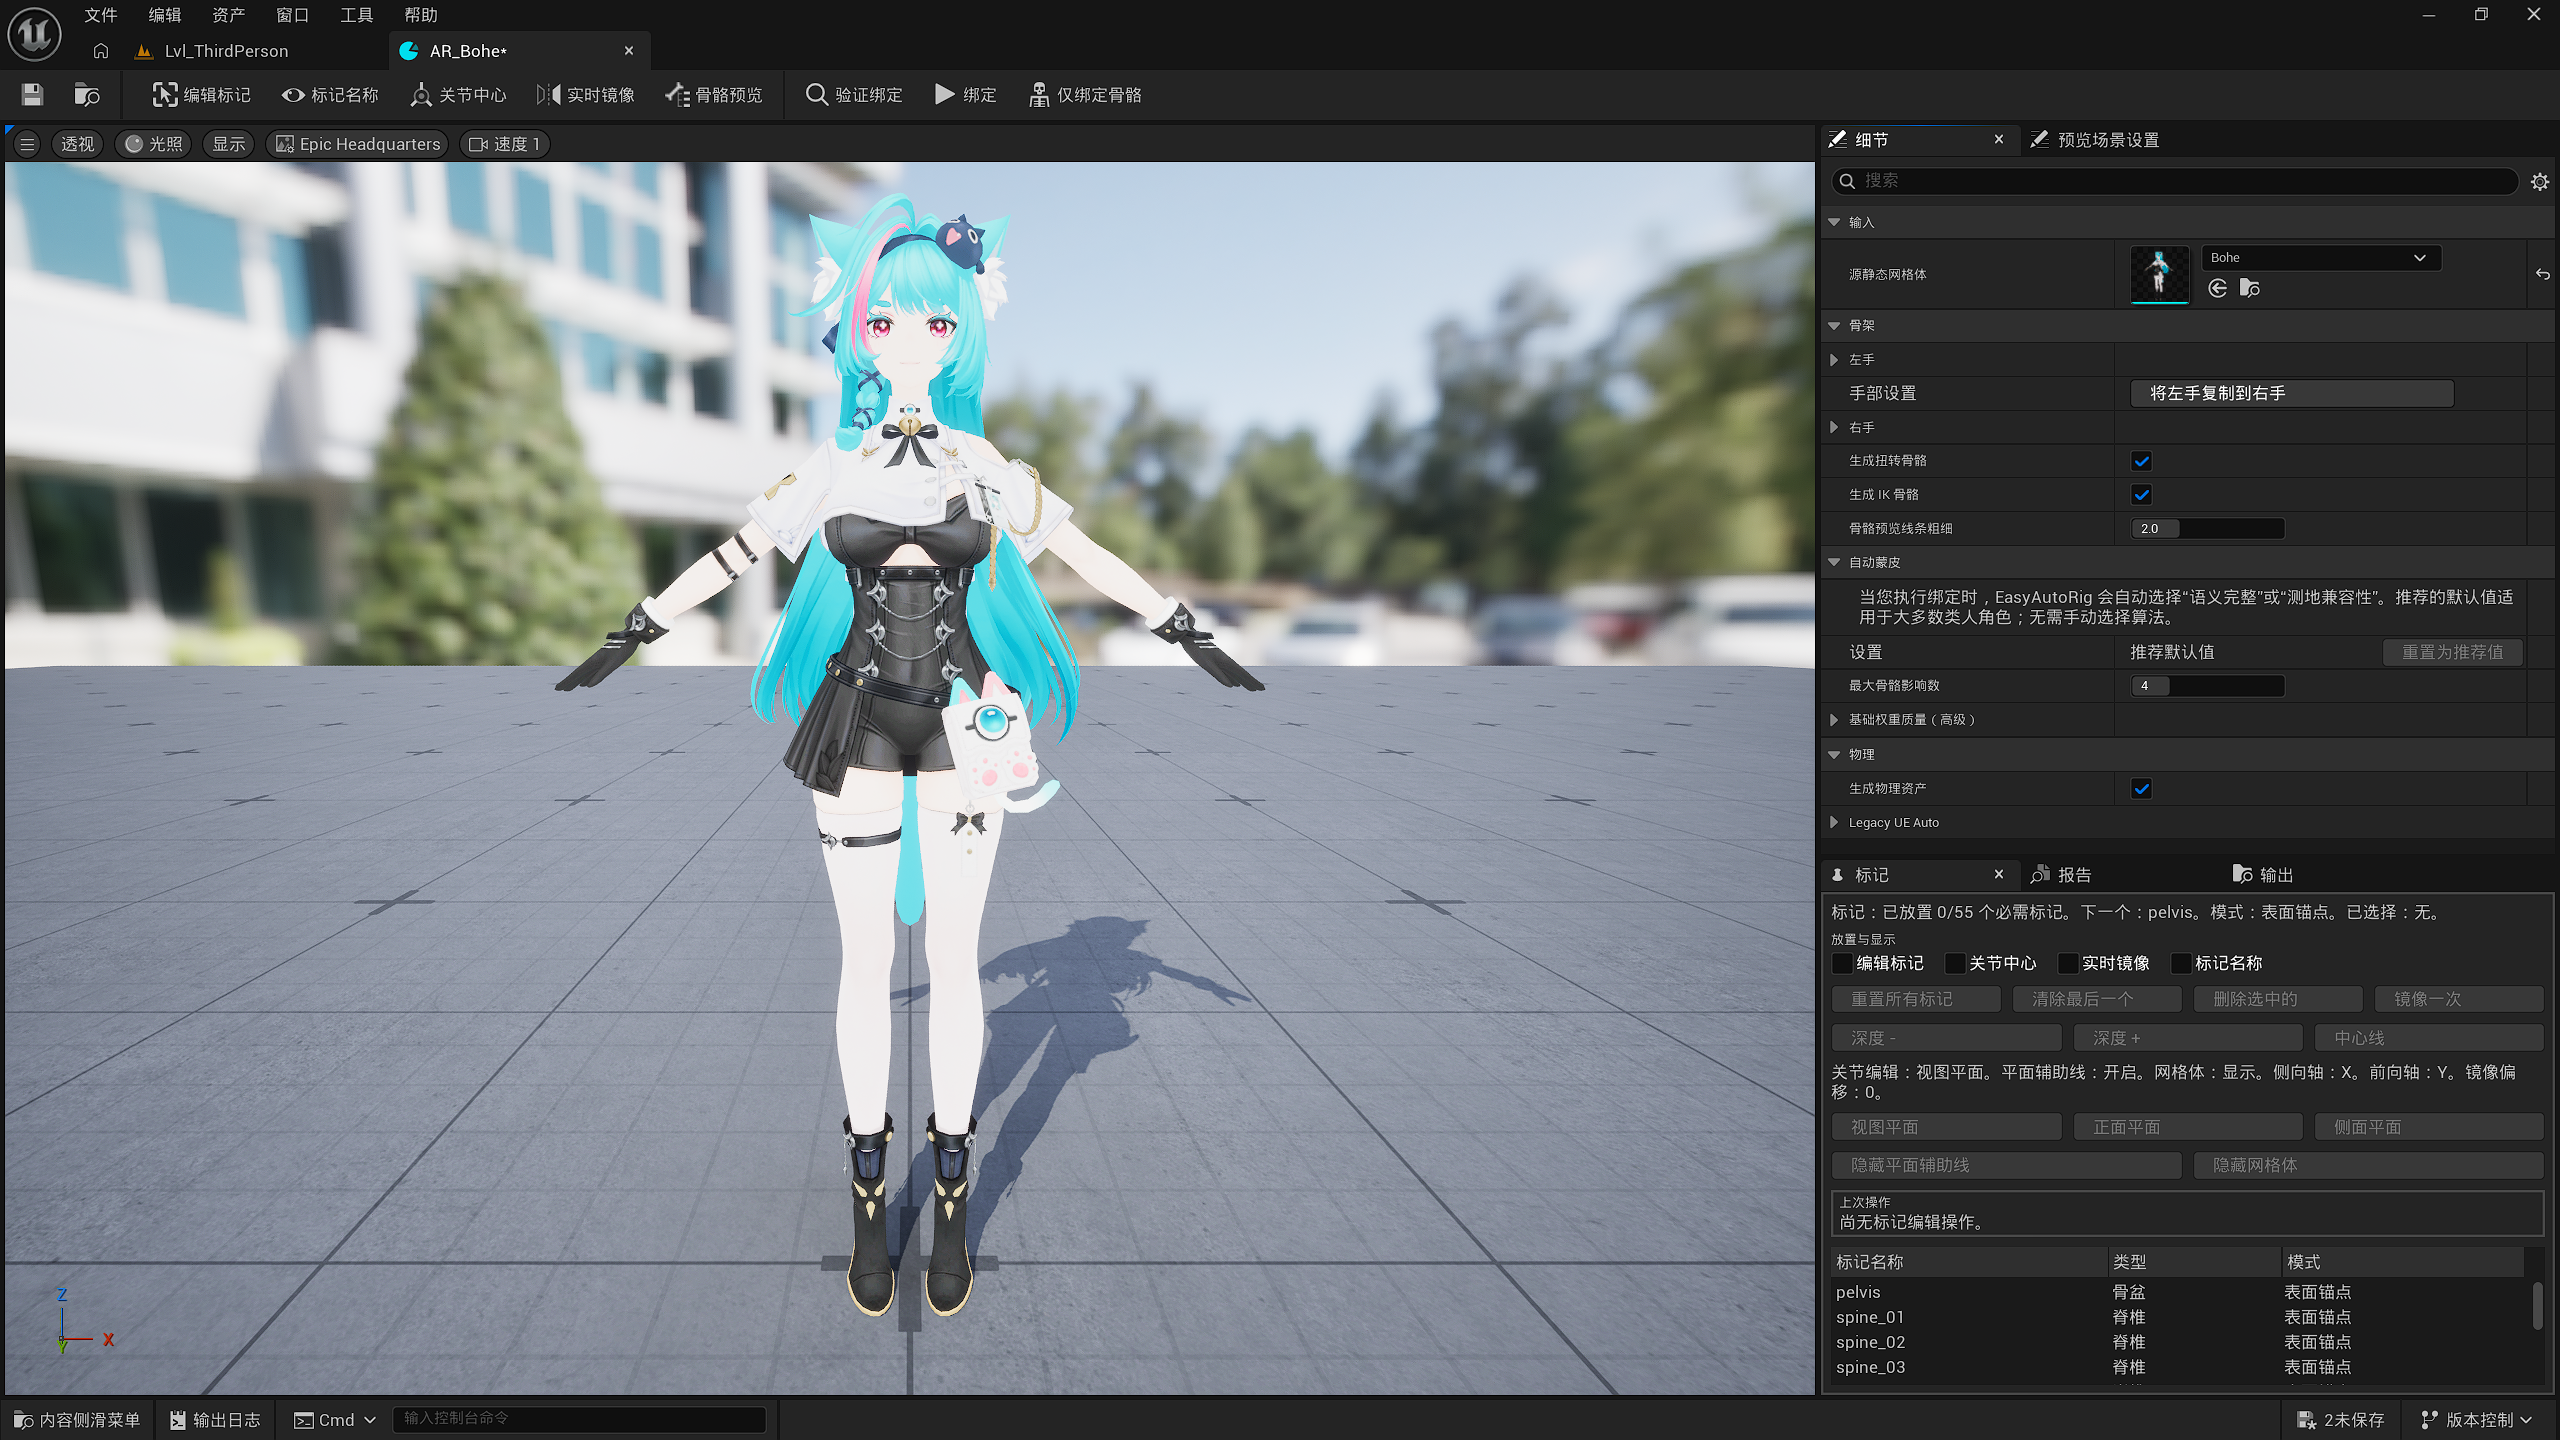
4.2 Select an A-Pose or T-Pose Static Mesh
In the Details panel, set Source Static Mesh to the humanoid character model you want to rig.
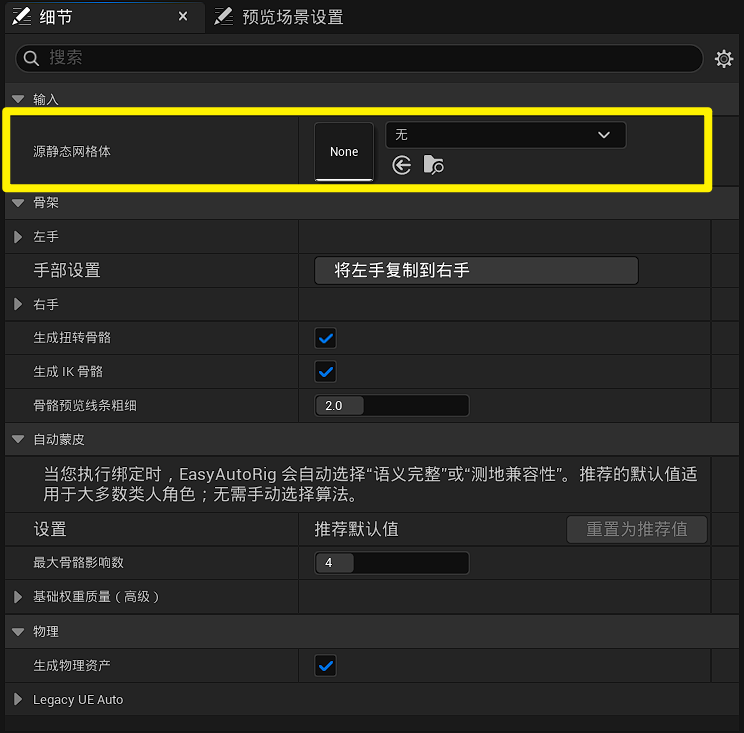
After selection, your model will appear in the viewport.
4.3 Start Placing and Adjusting Landmarks
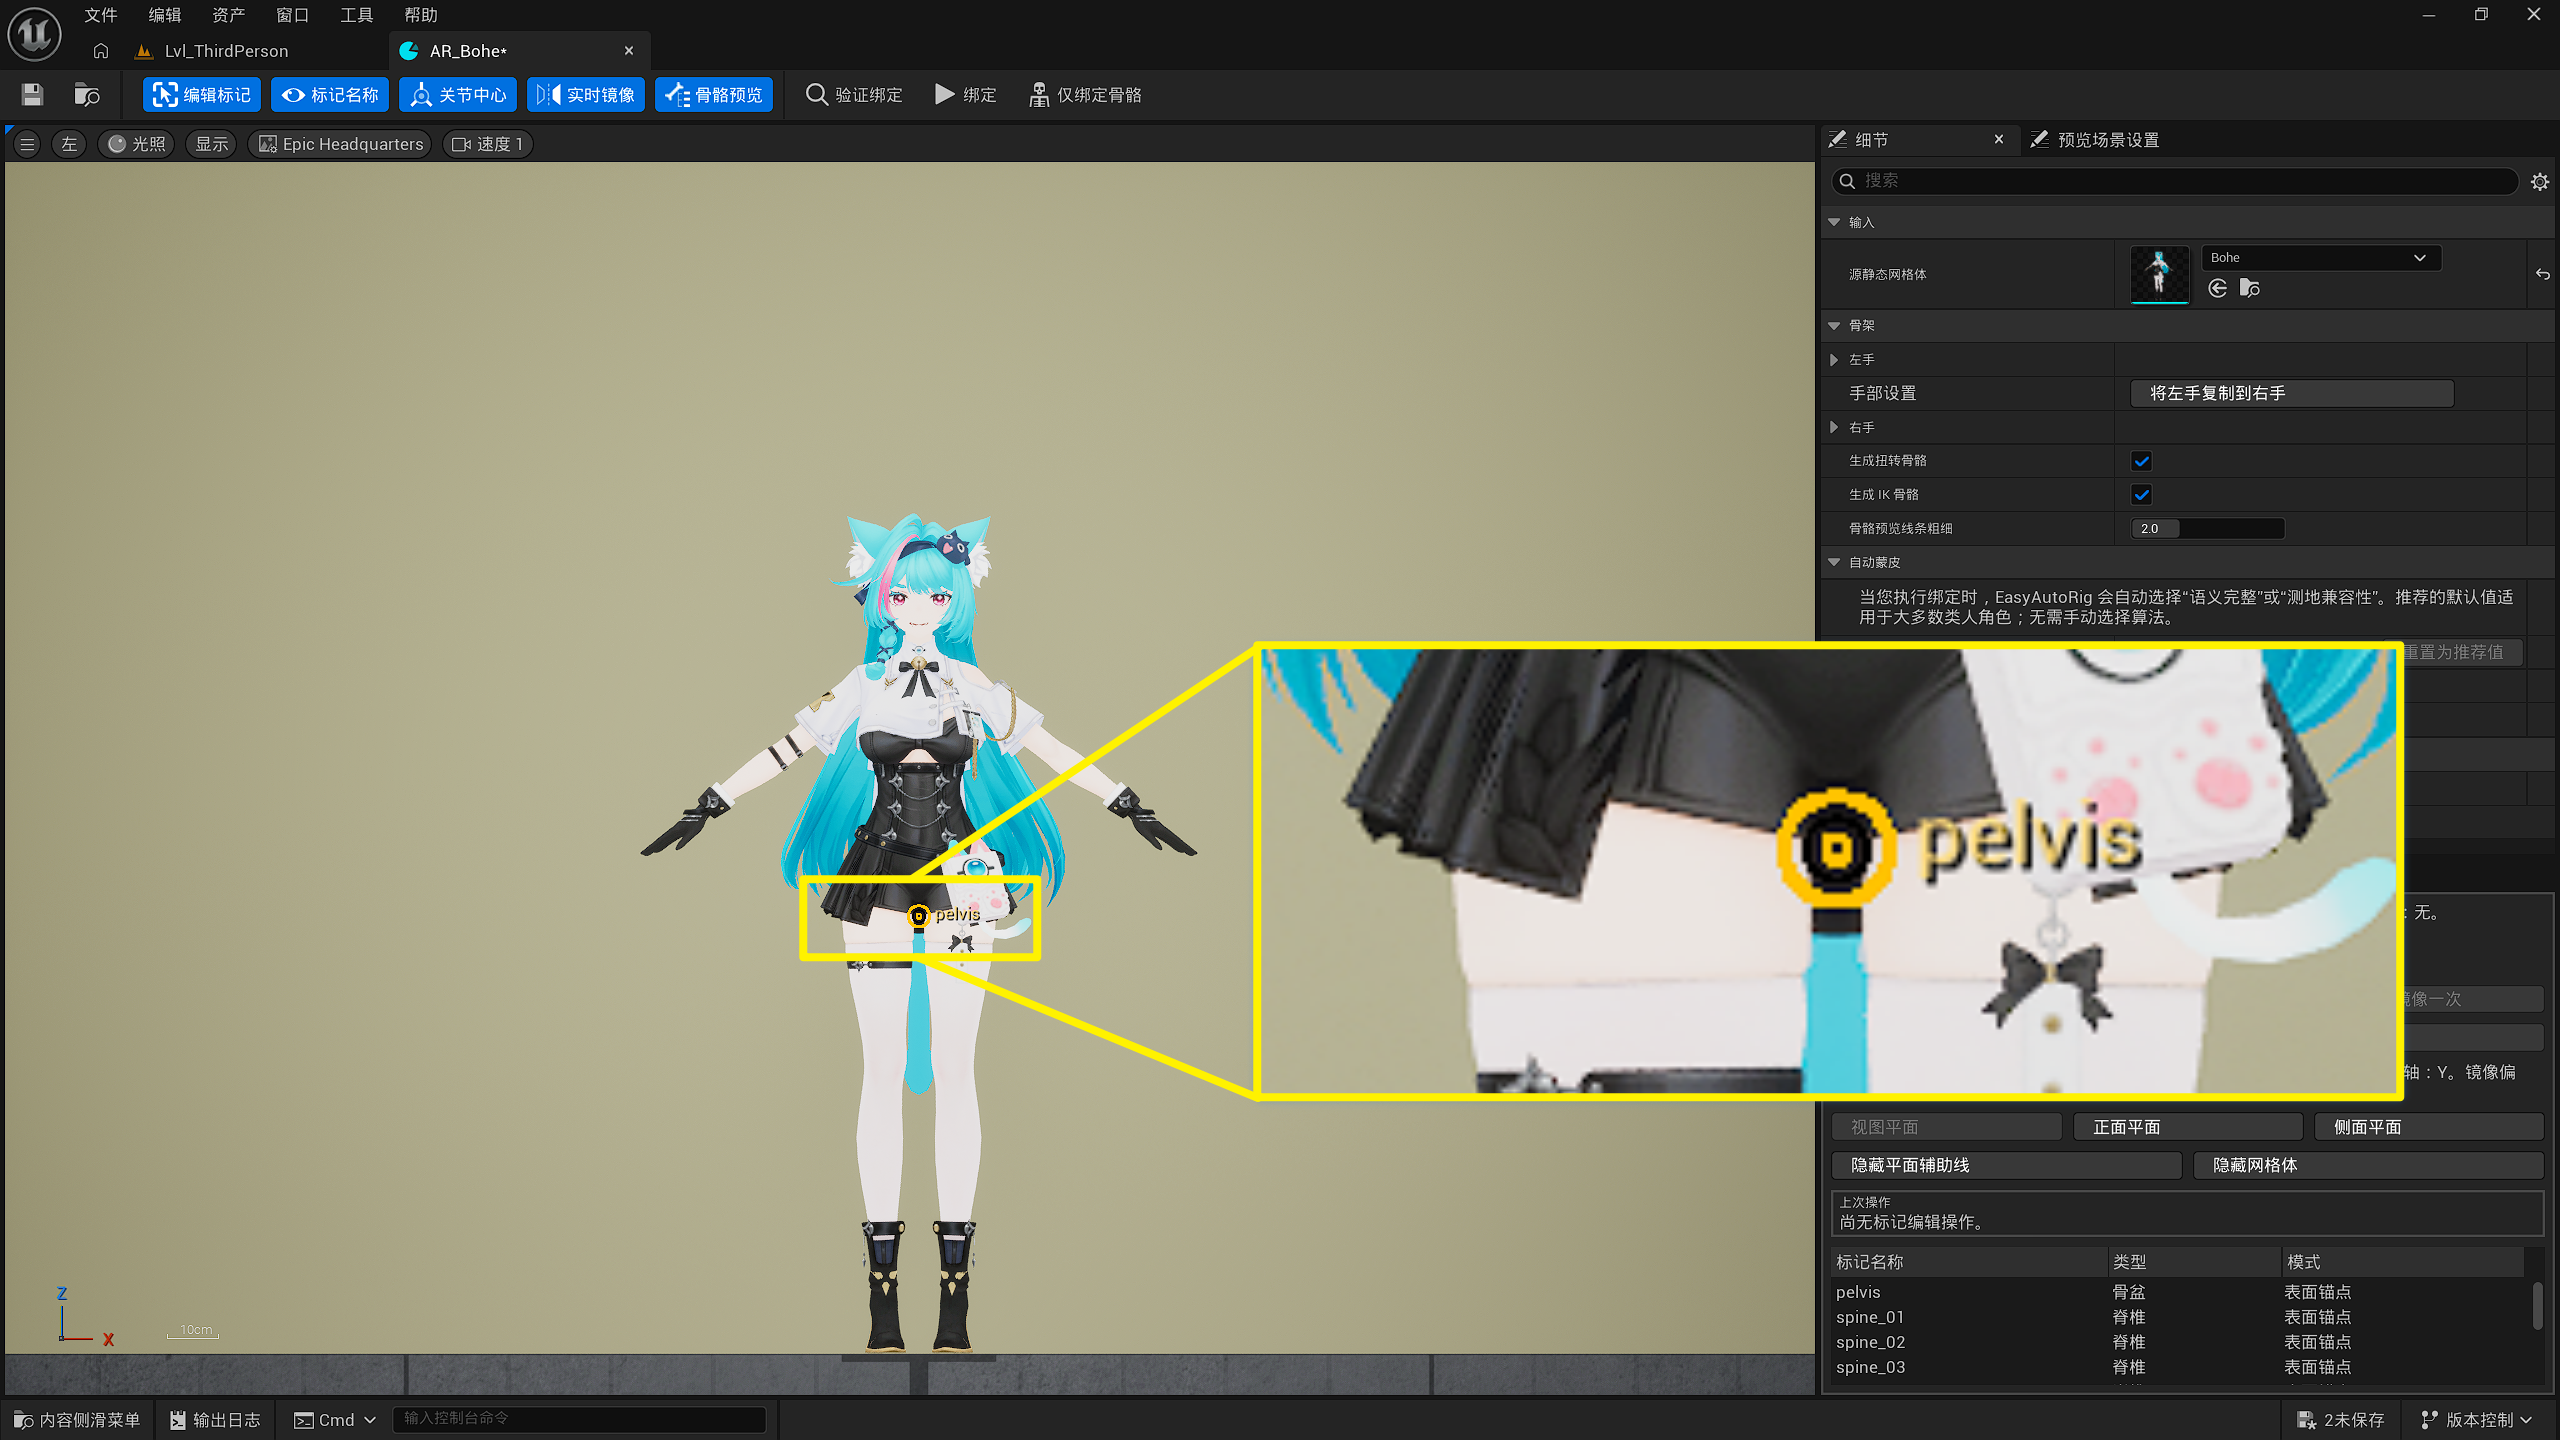
Enable Edit Landmarks, Landmark Names, Joint Center, Live Mirror, and Skeleton Preview from the top toolbar.

You can now start placing Landmarks. Landmarks can be placed in Perspective view, Left view, or Front view.
Perspective view shortcut: Alt + G; Left view shortcut: Alt + K; Front view shortcut: Alt + H.
Place Landmarks
The yellow Landmark indicates the next Landmark that needs to be placed. In the example below, the next Landmark is pelvis.
Simply click the position where you want to place it. Landmarks on the center line automatically snap to the center line.
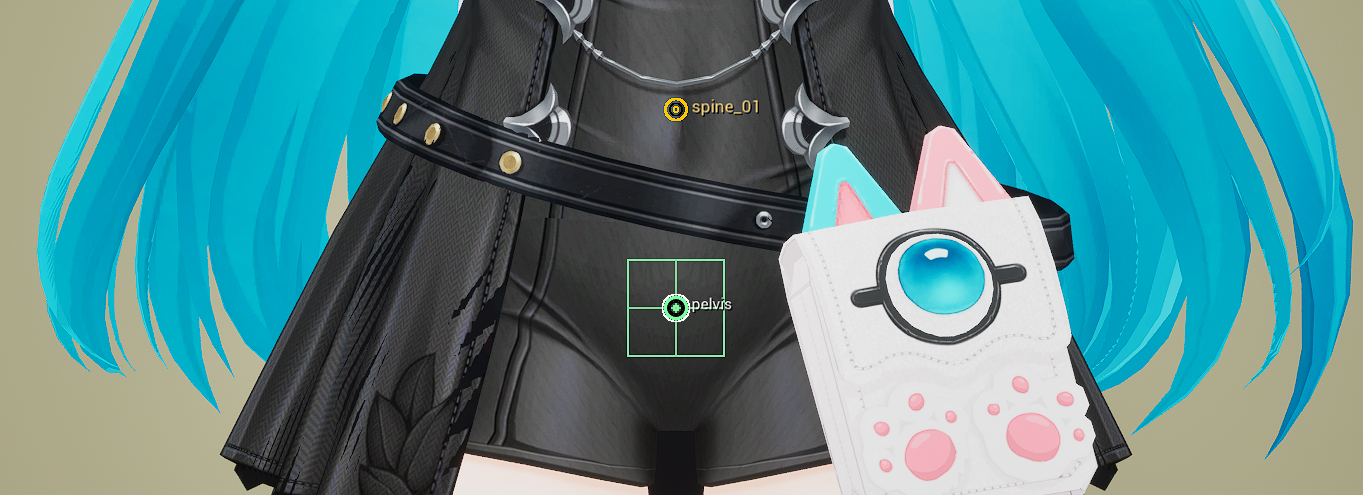
After placement, the Landmark turns green. The green wireframe is a guide that shows the plane used when moving the Landmark.
Next, place spine_01, and continue in the same way.
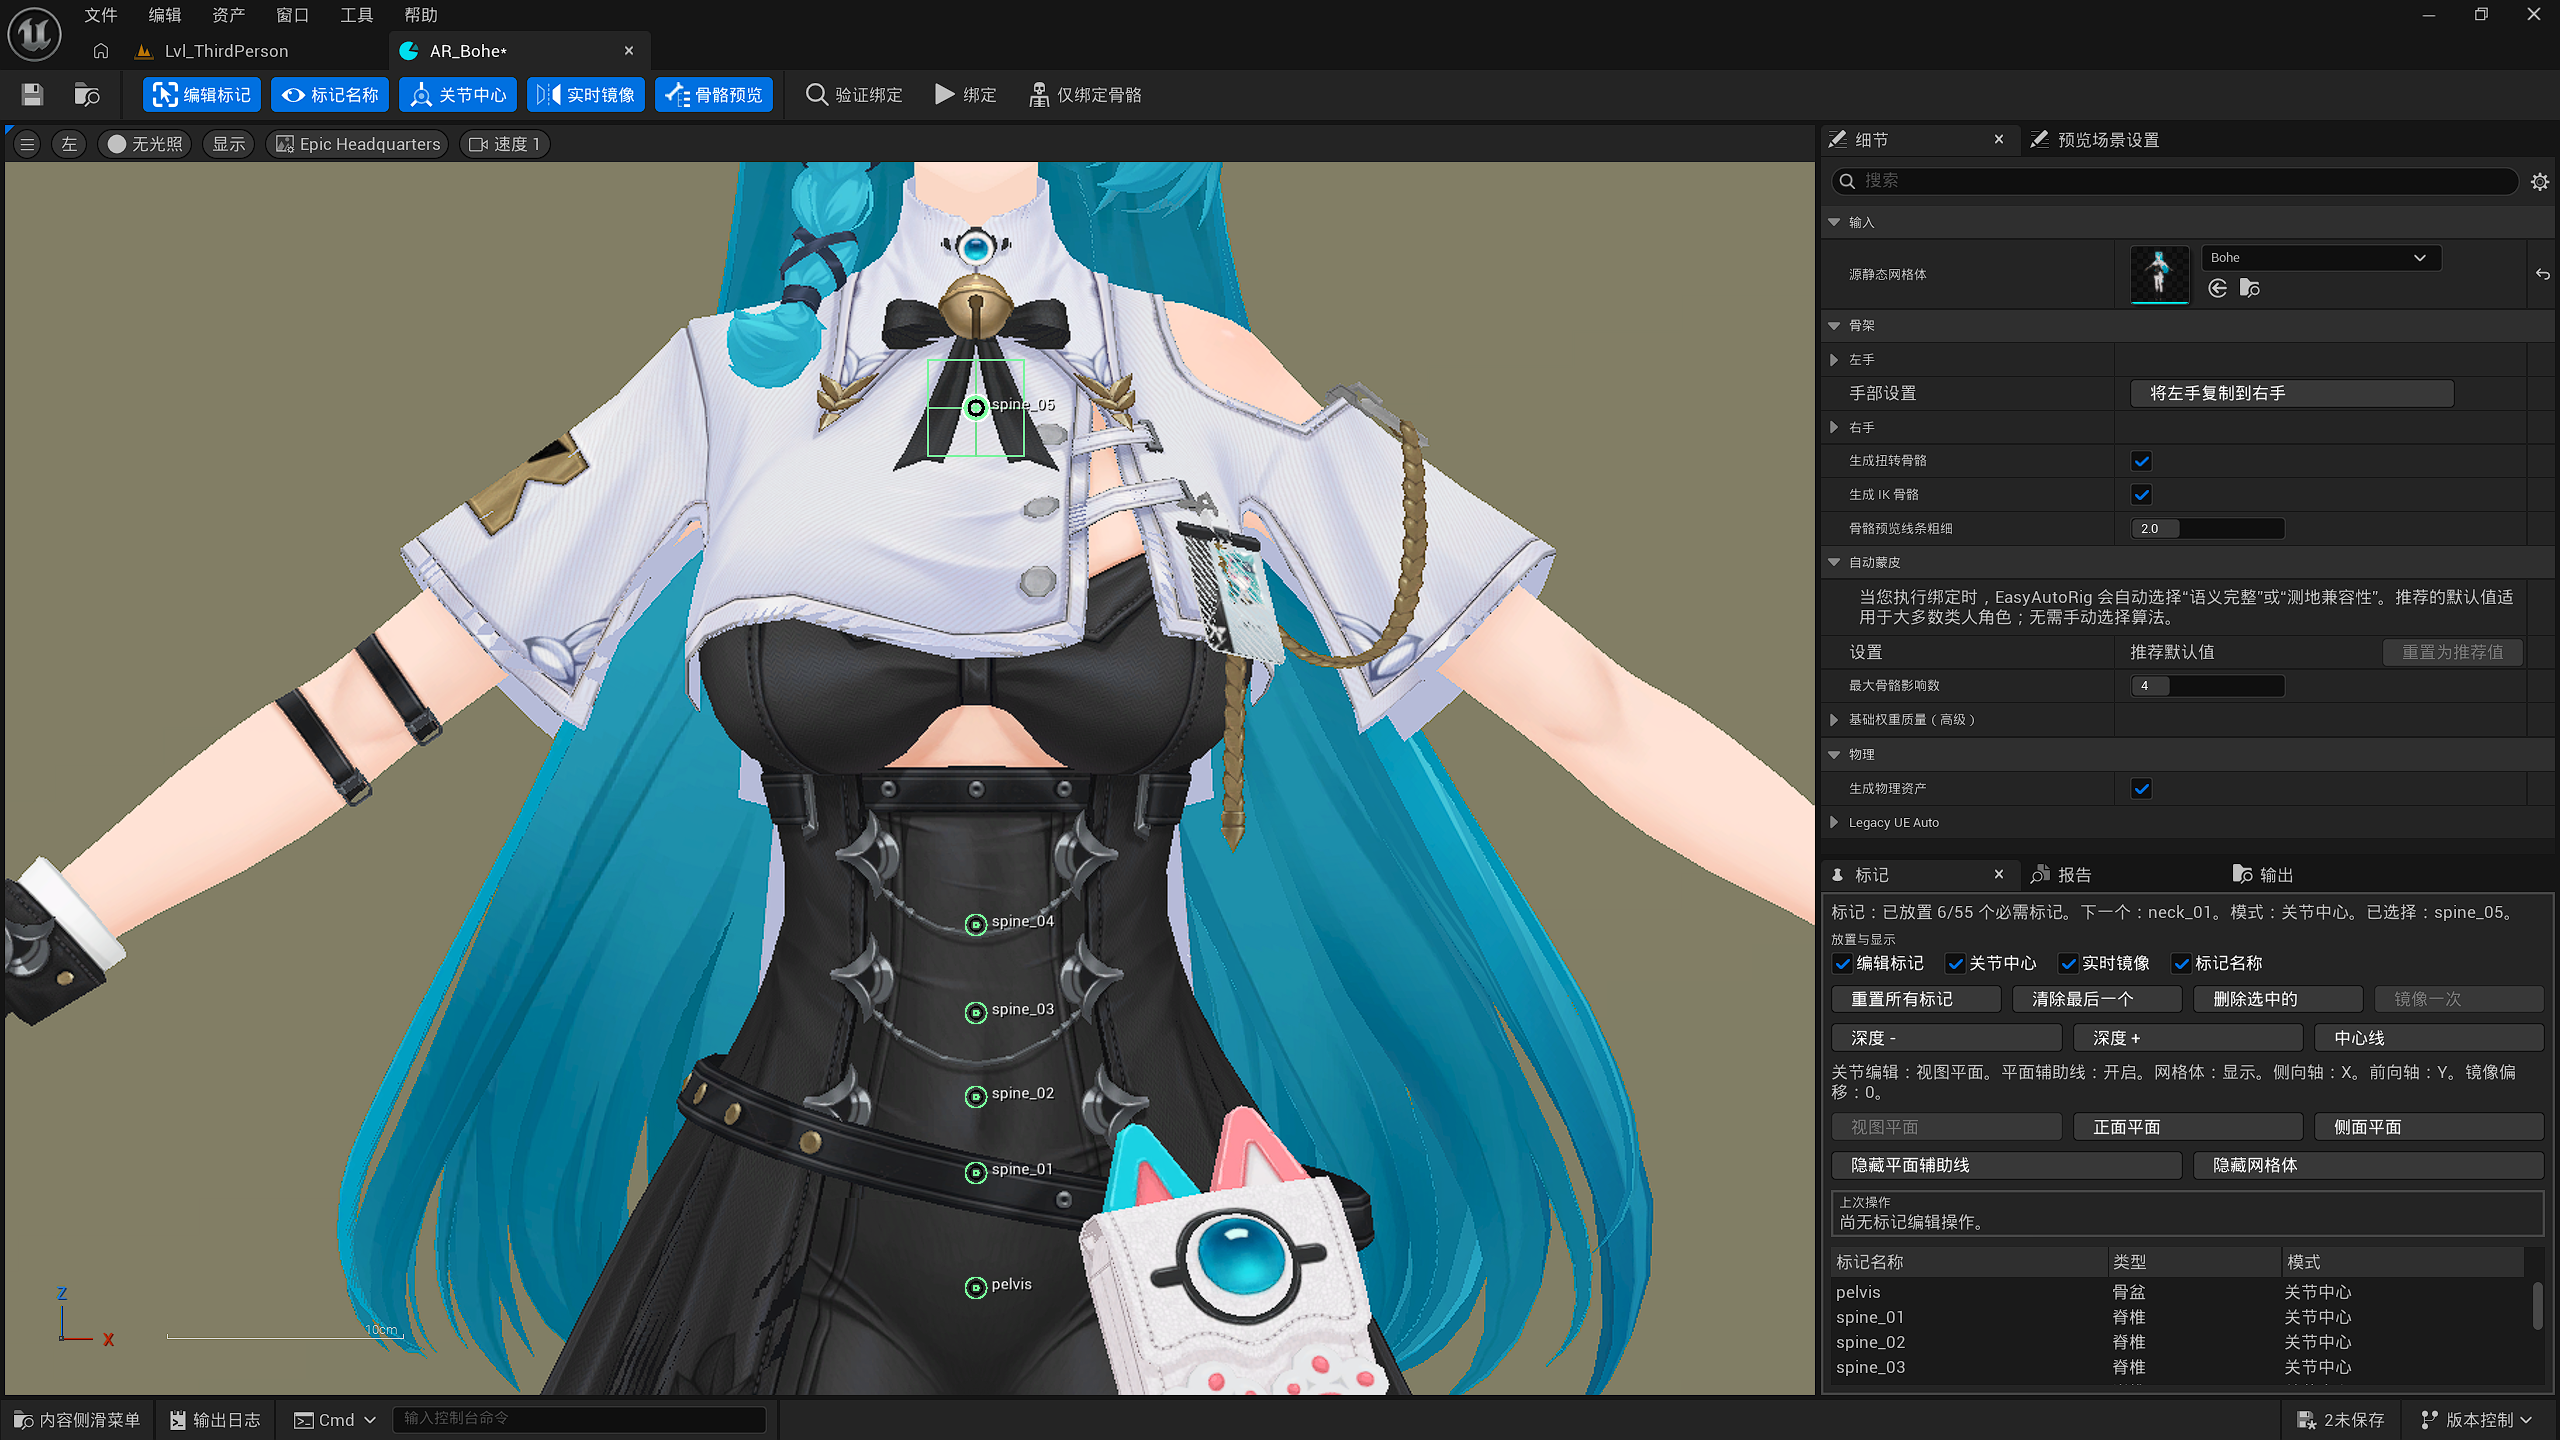
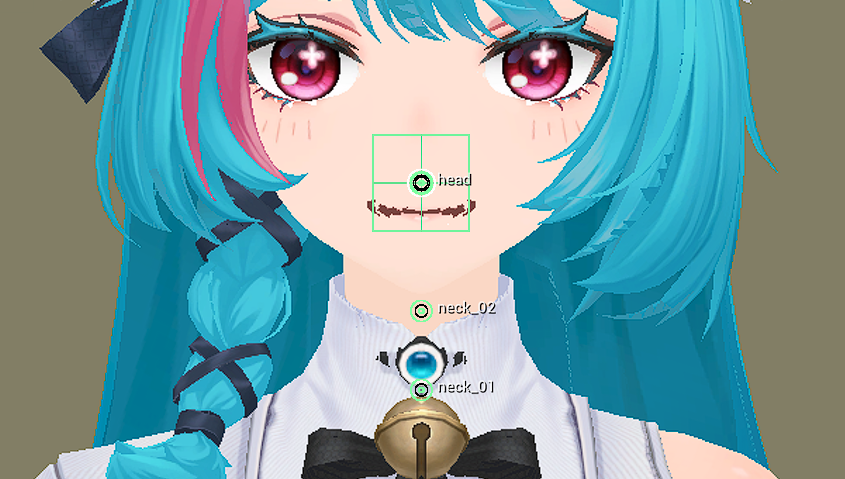
Place clavicle_l on the clavicle. Because Live Mirror is enabled, the corresponding Landmark on the right side will be placed automatically.
Therefore, you only need to place the Landmarks on the left side, and the right side will be mirrored automatically.
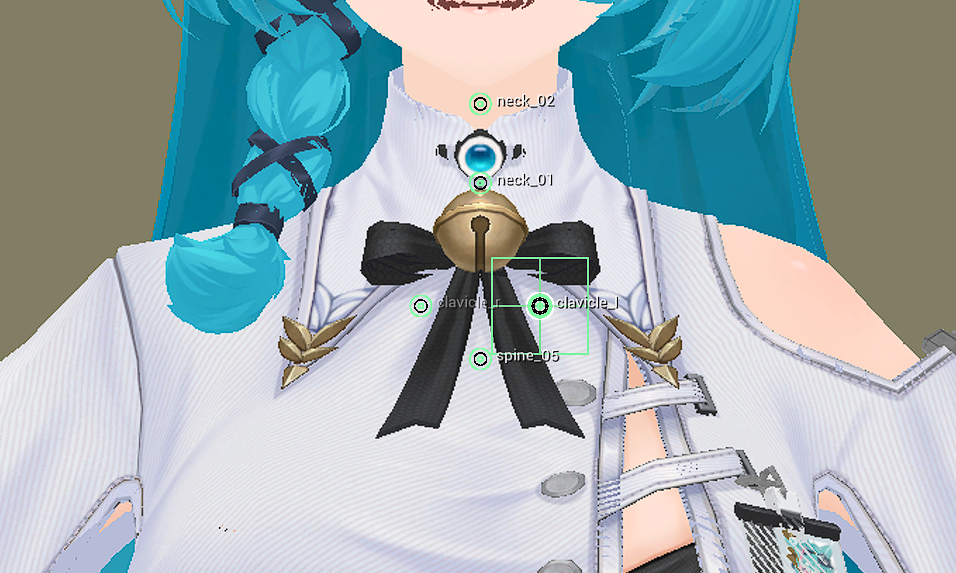
Place the left arm Landmarks.
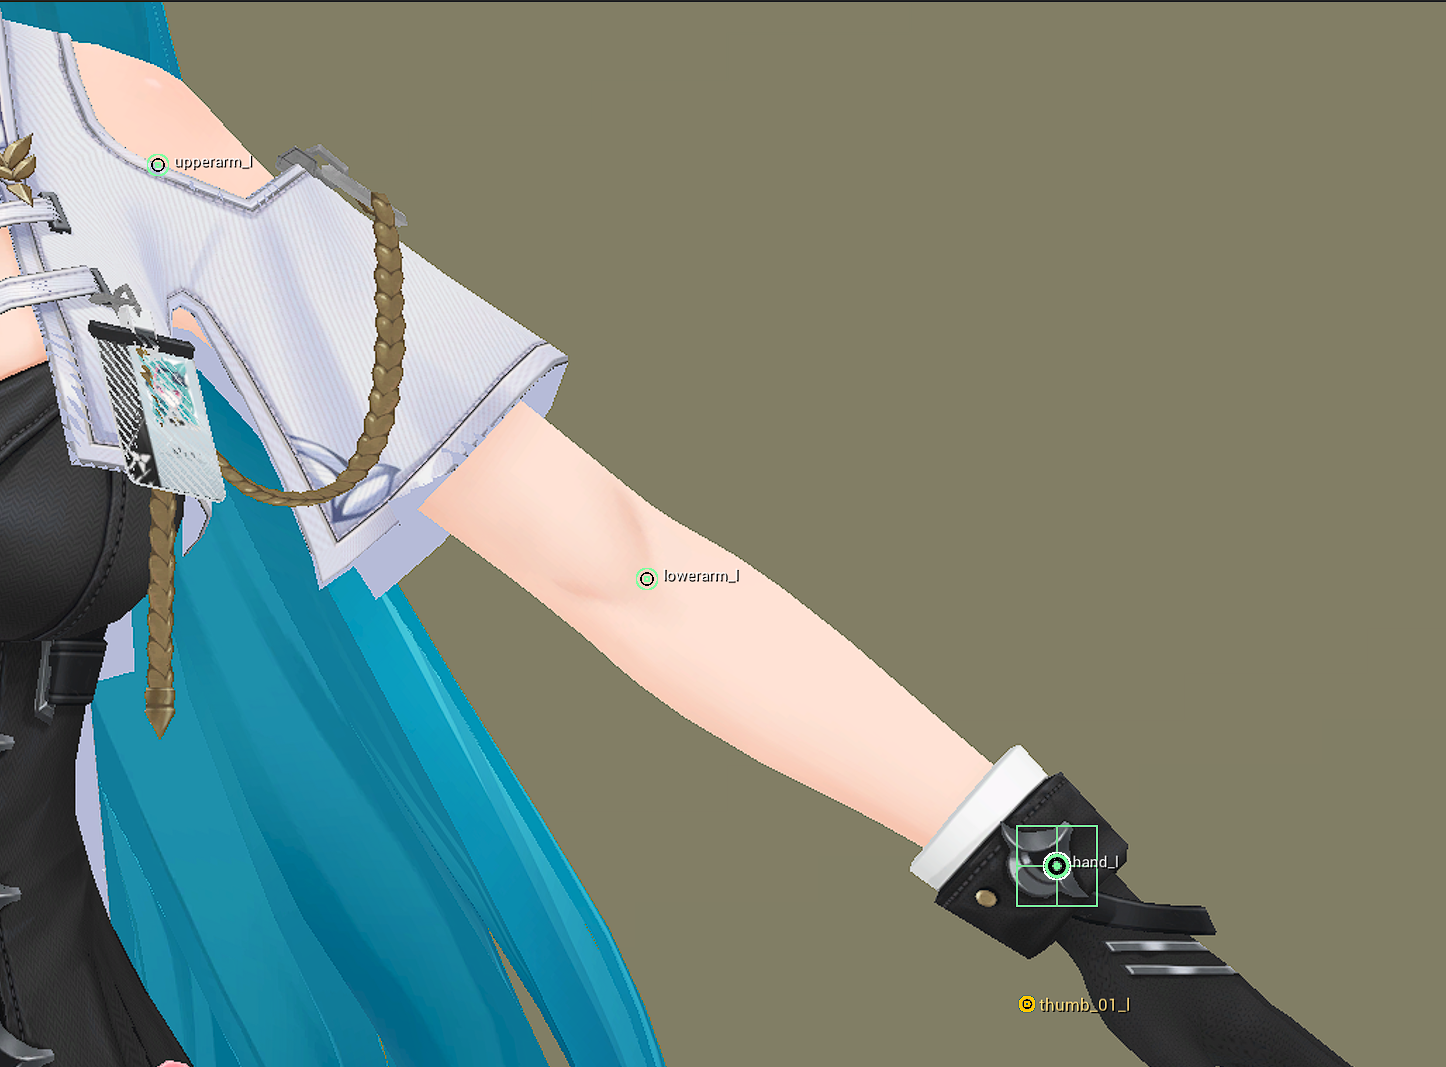
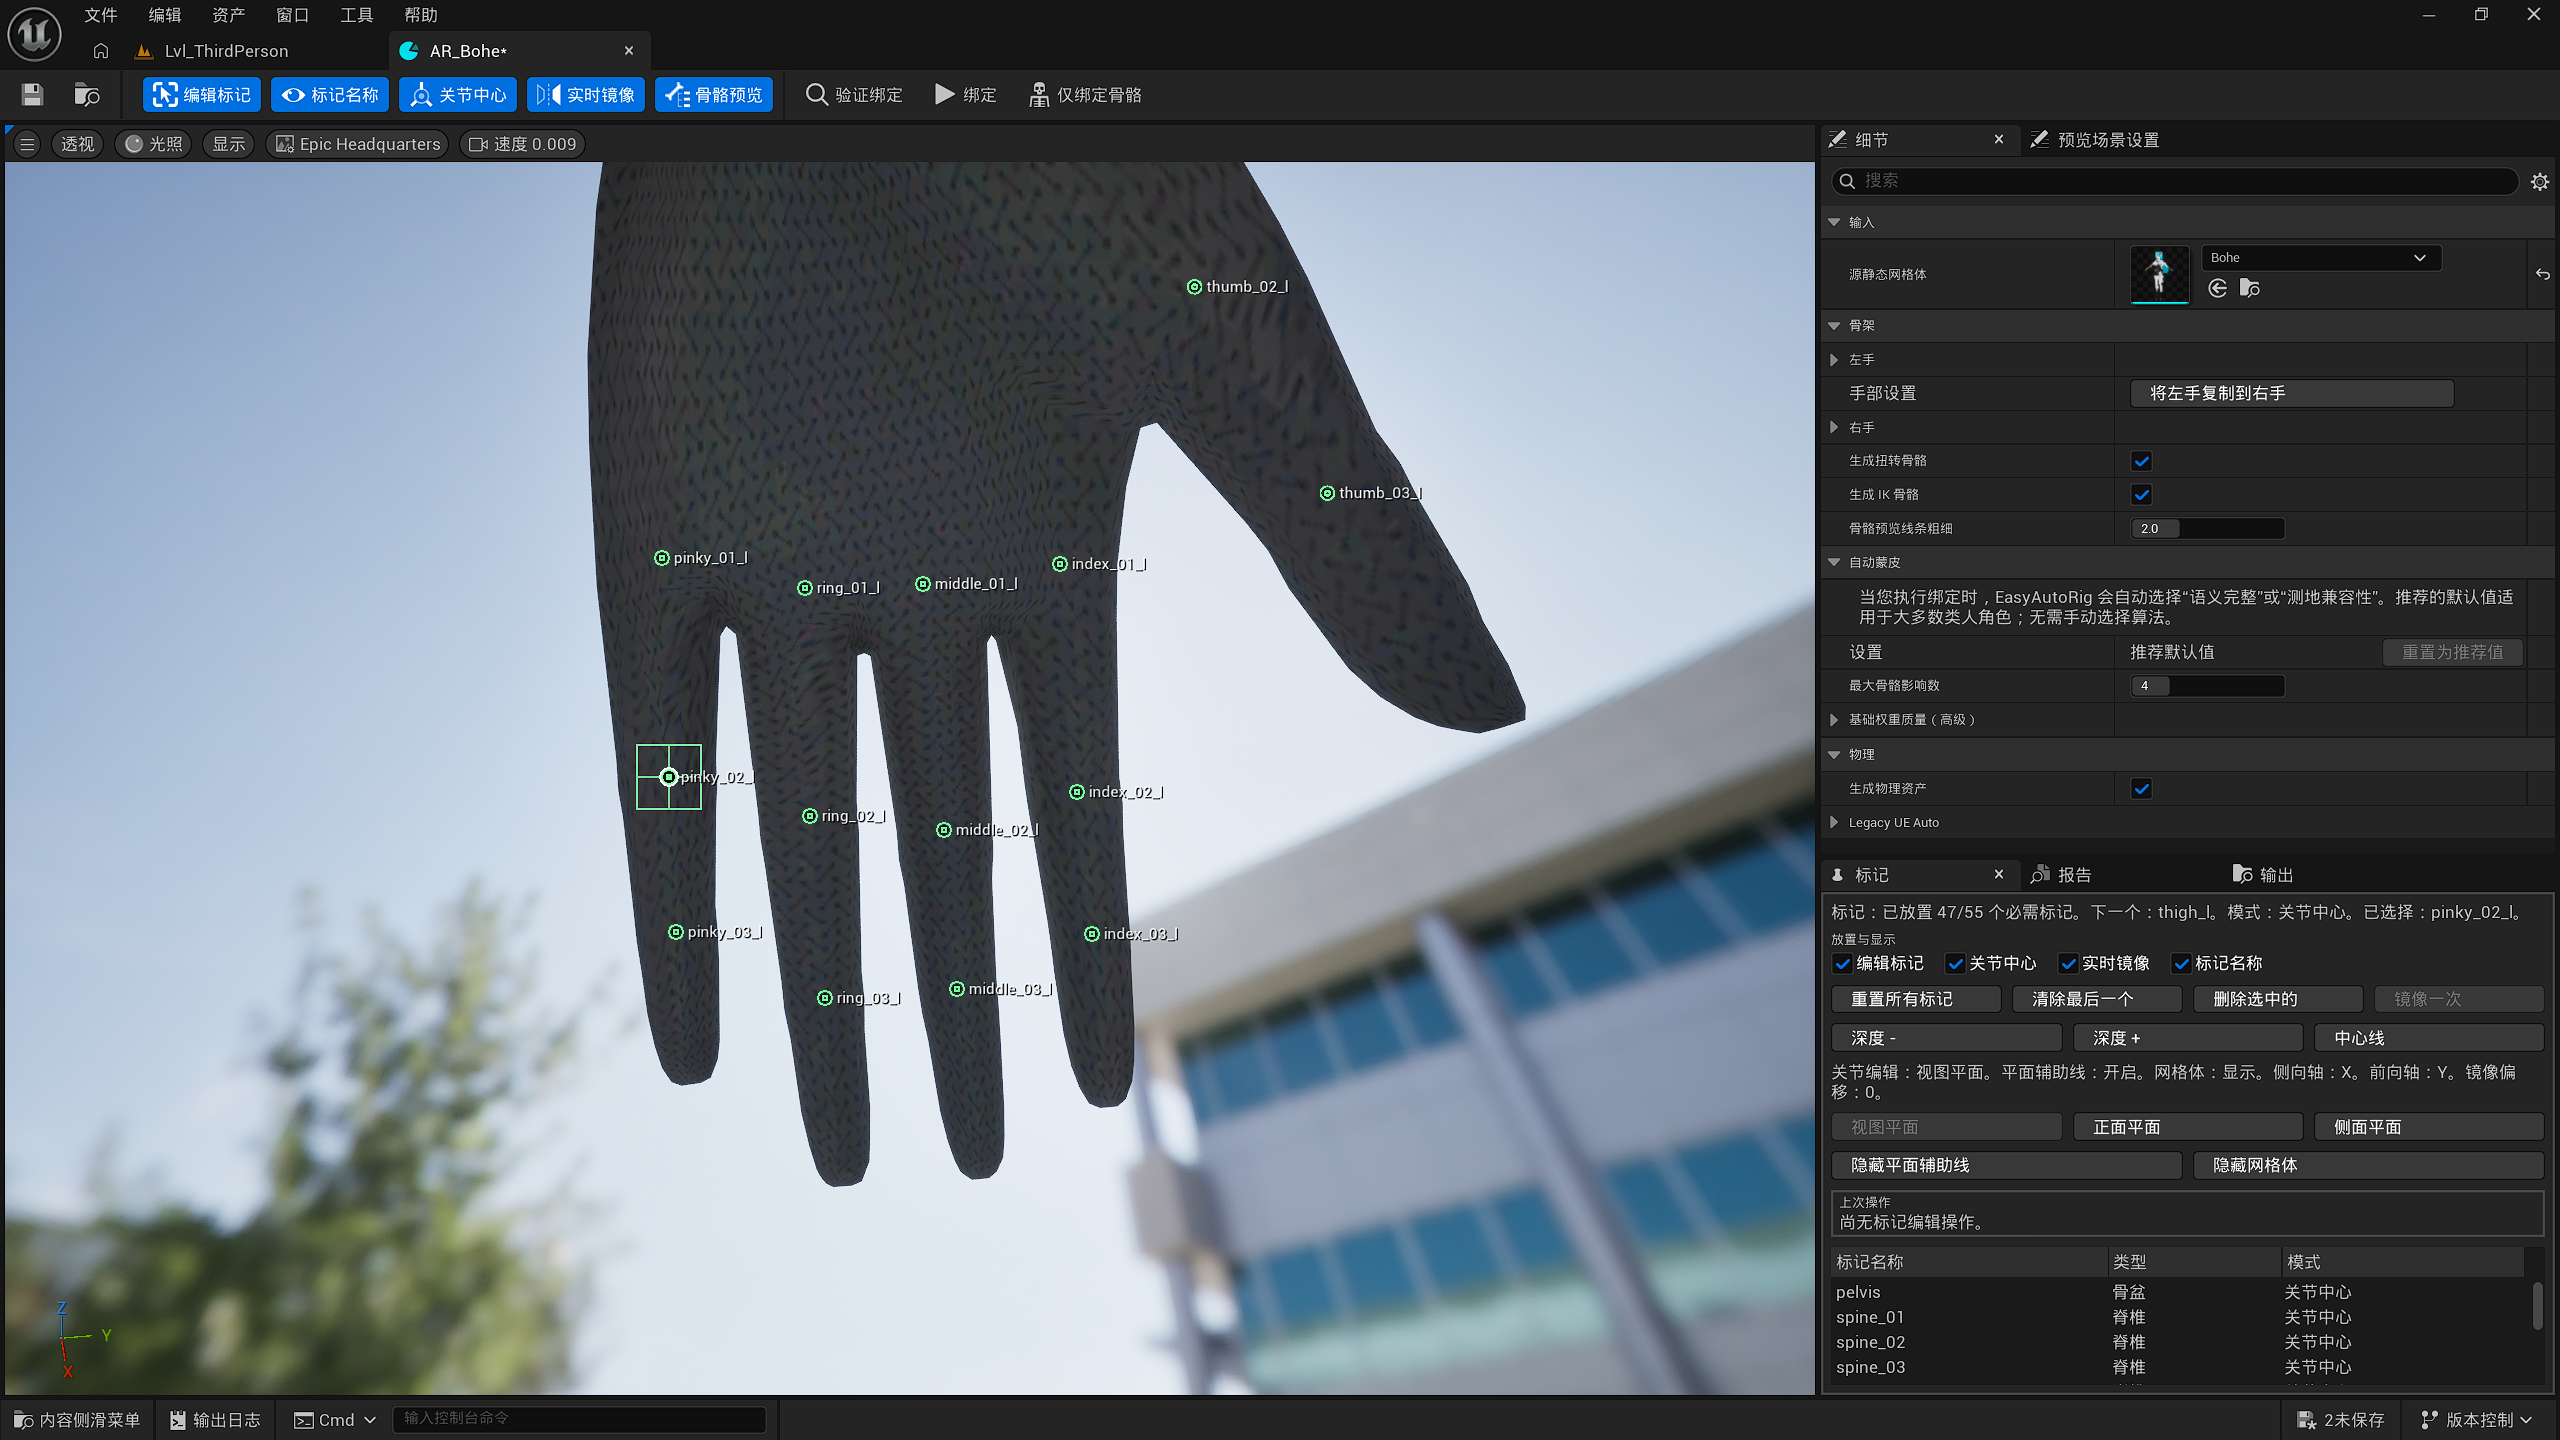
Place the finger Landmarks.
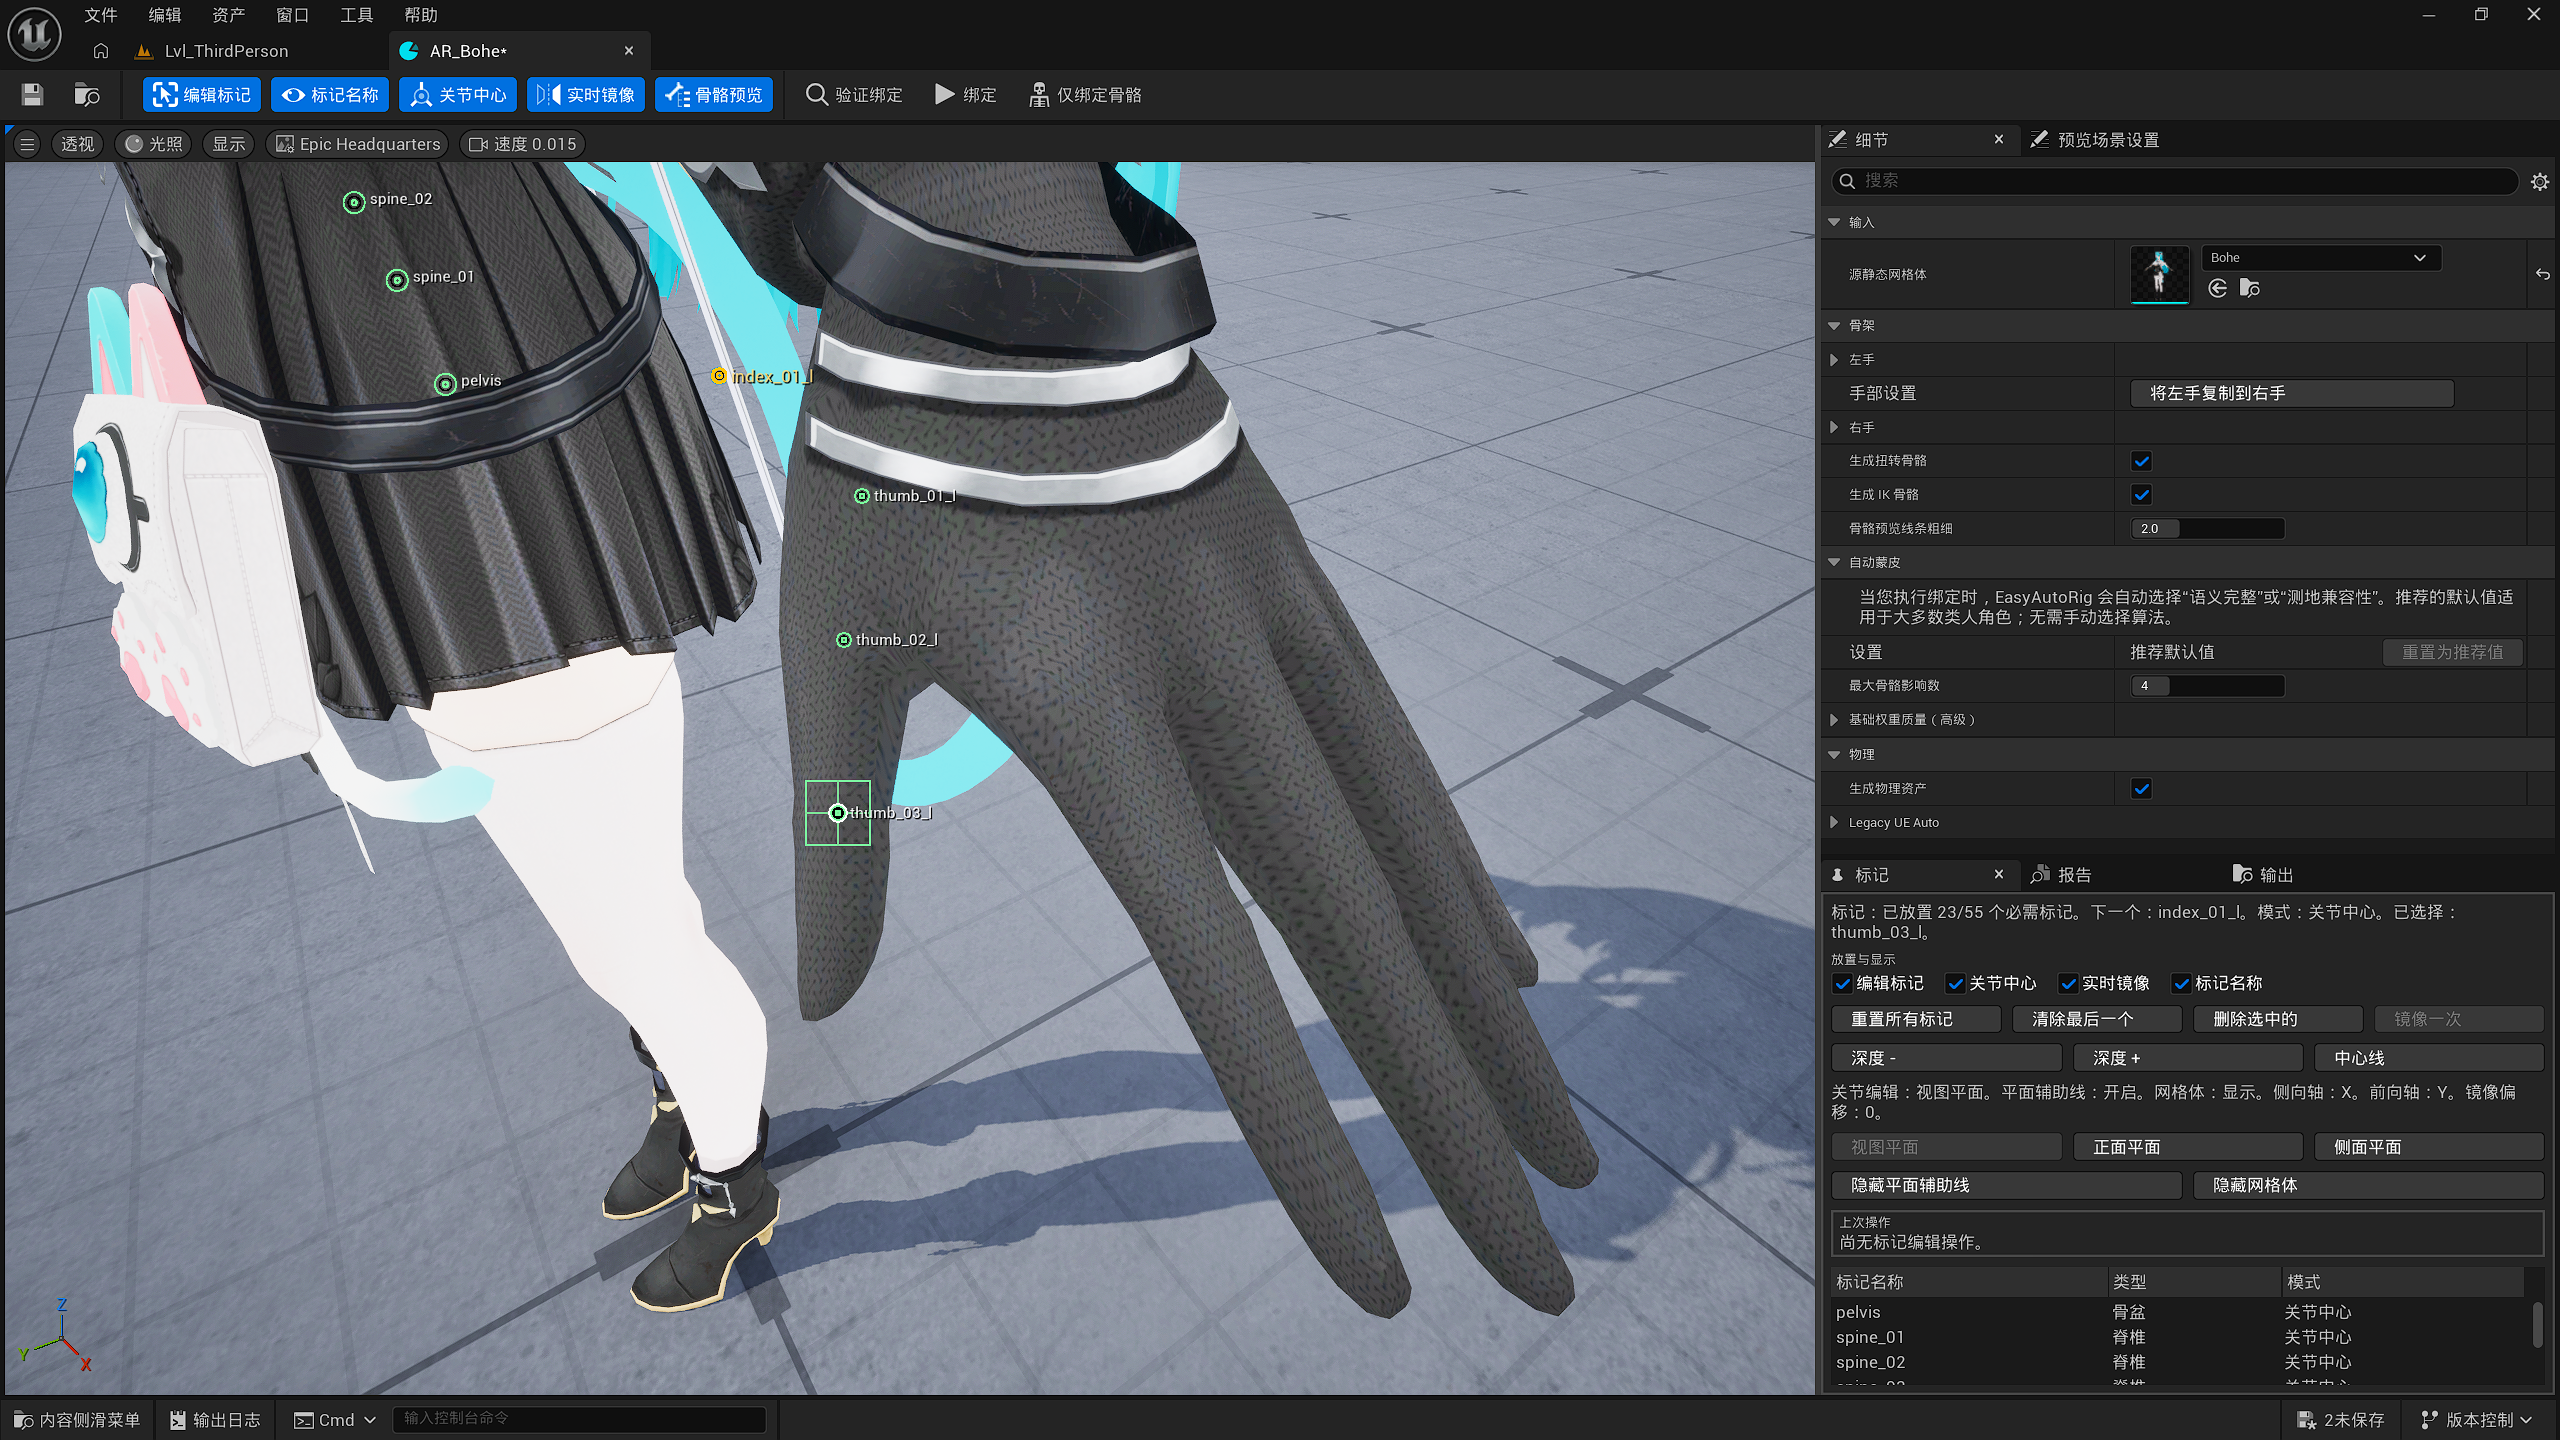
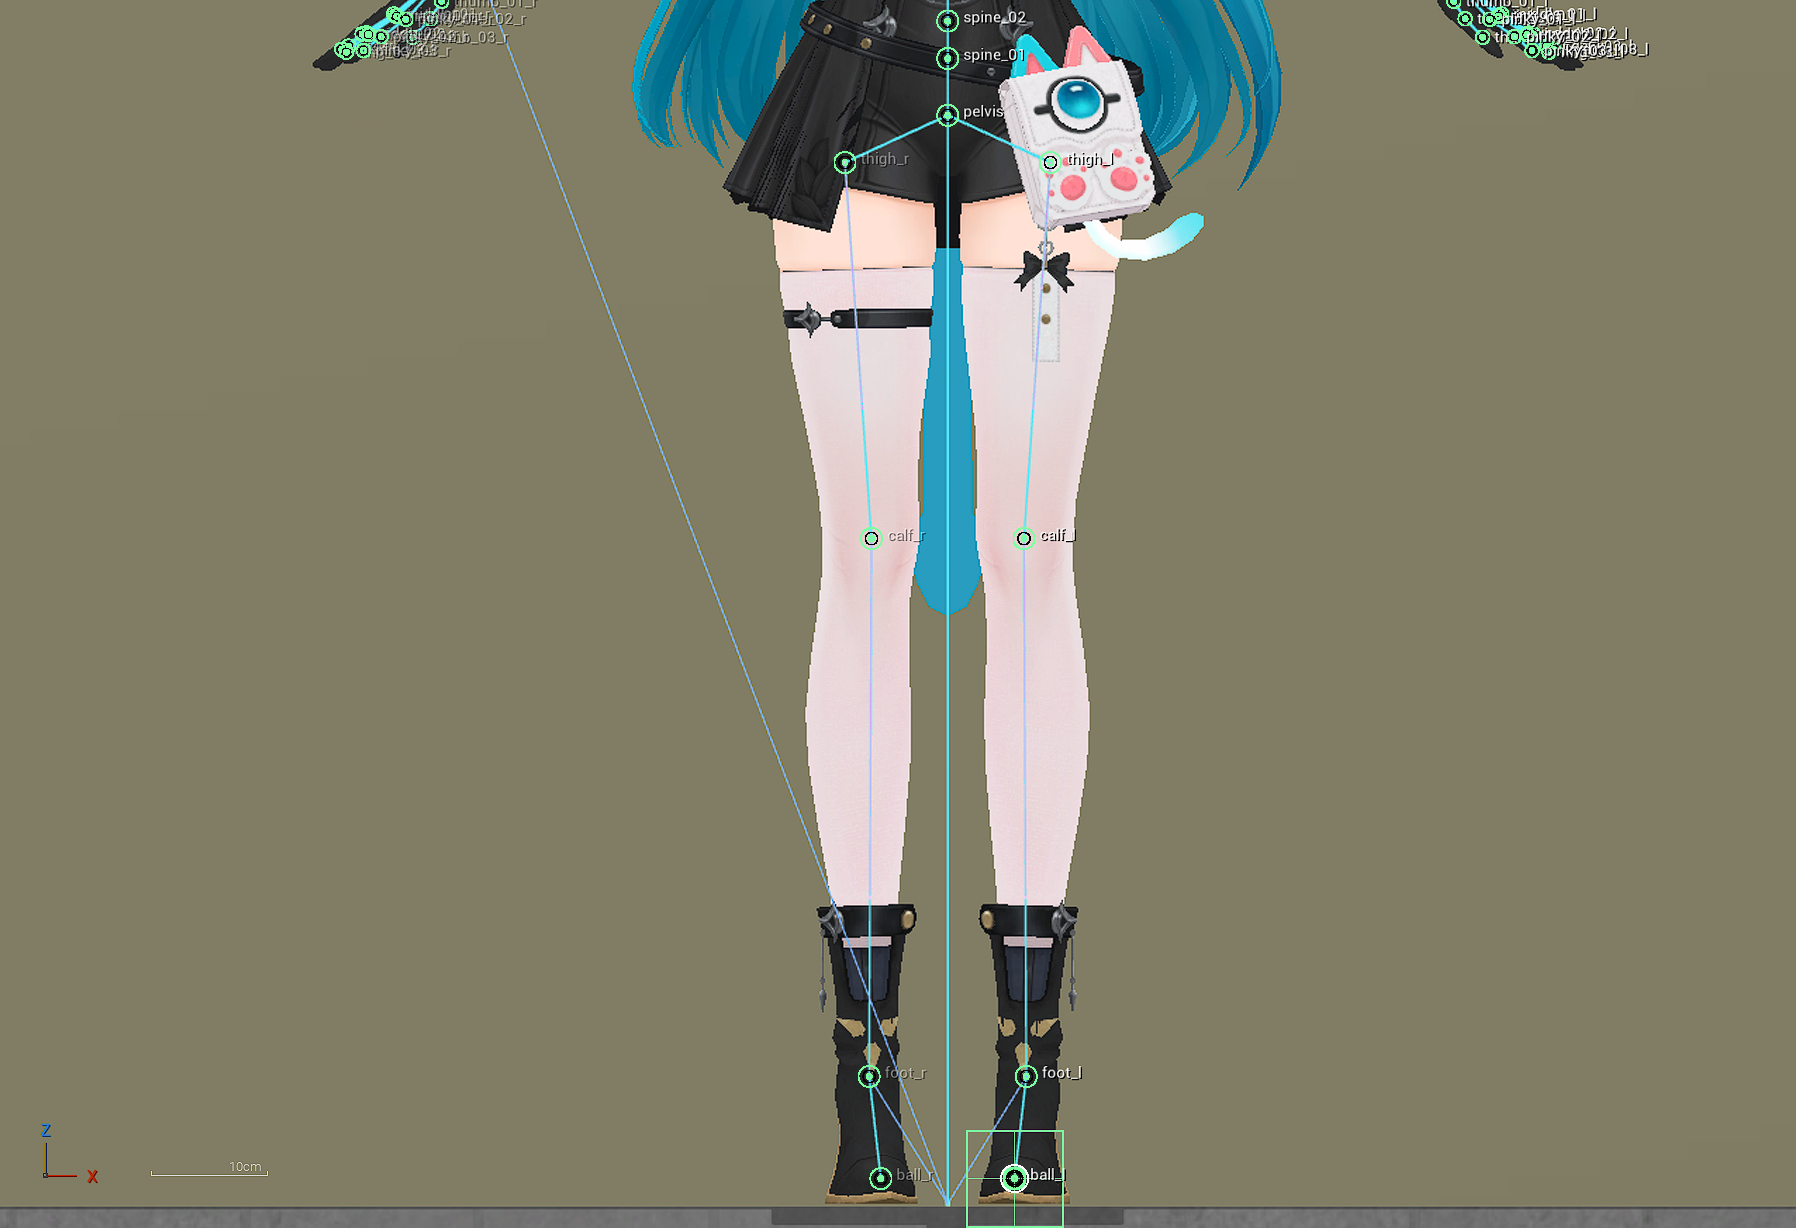
Place the leg Landmarks.
Adjust Landmarks
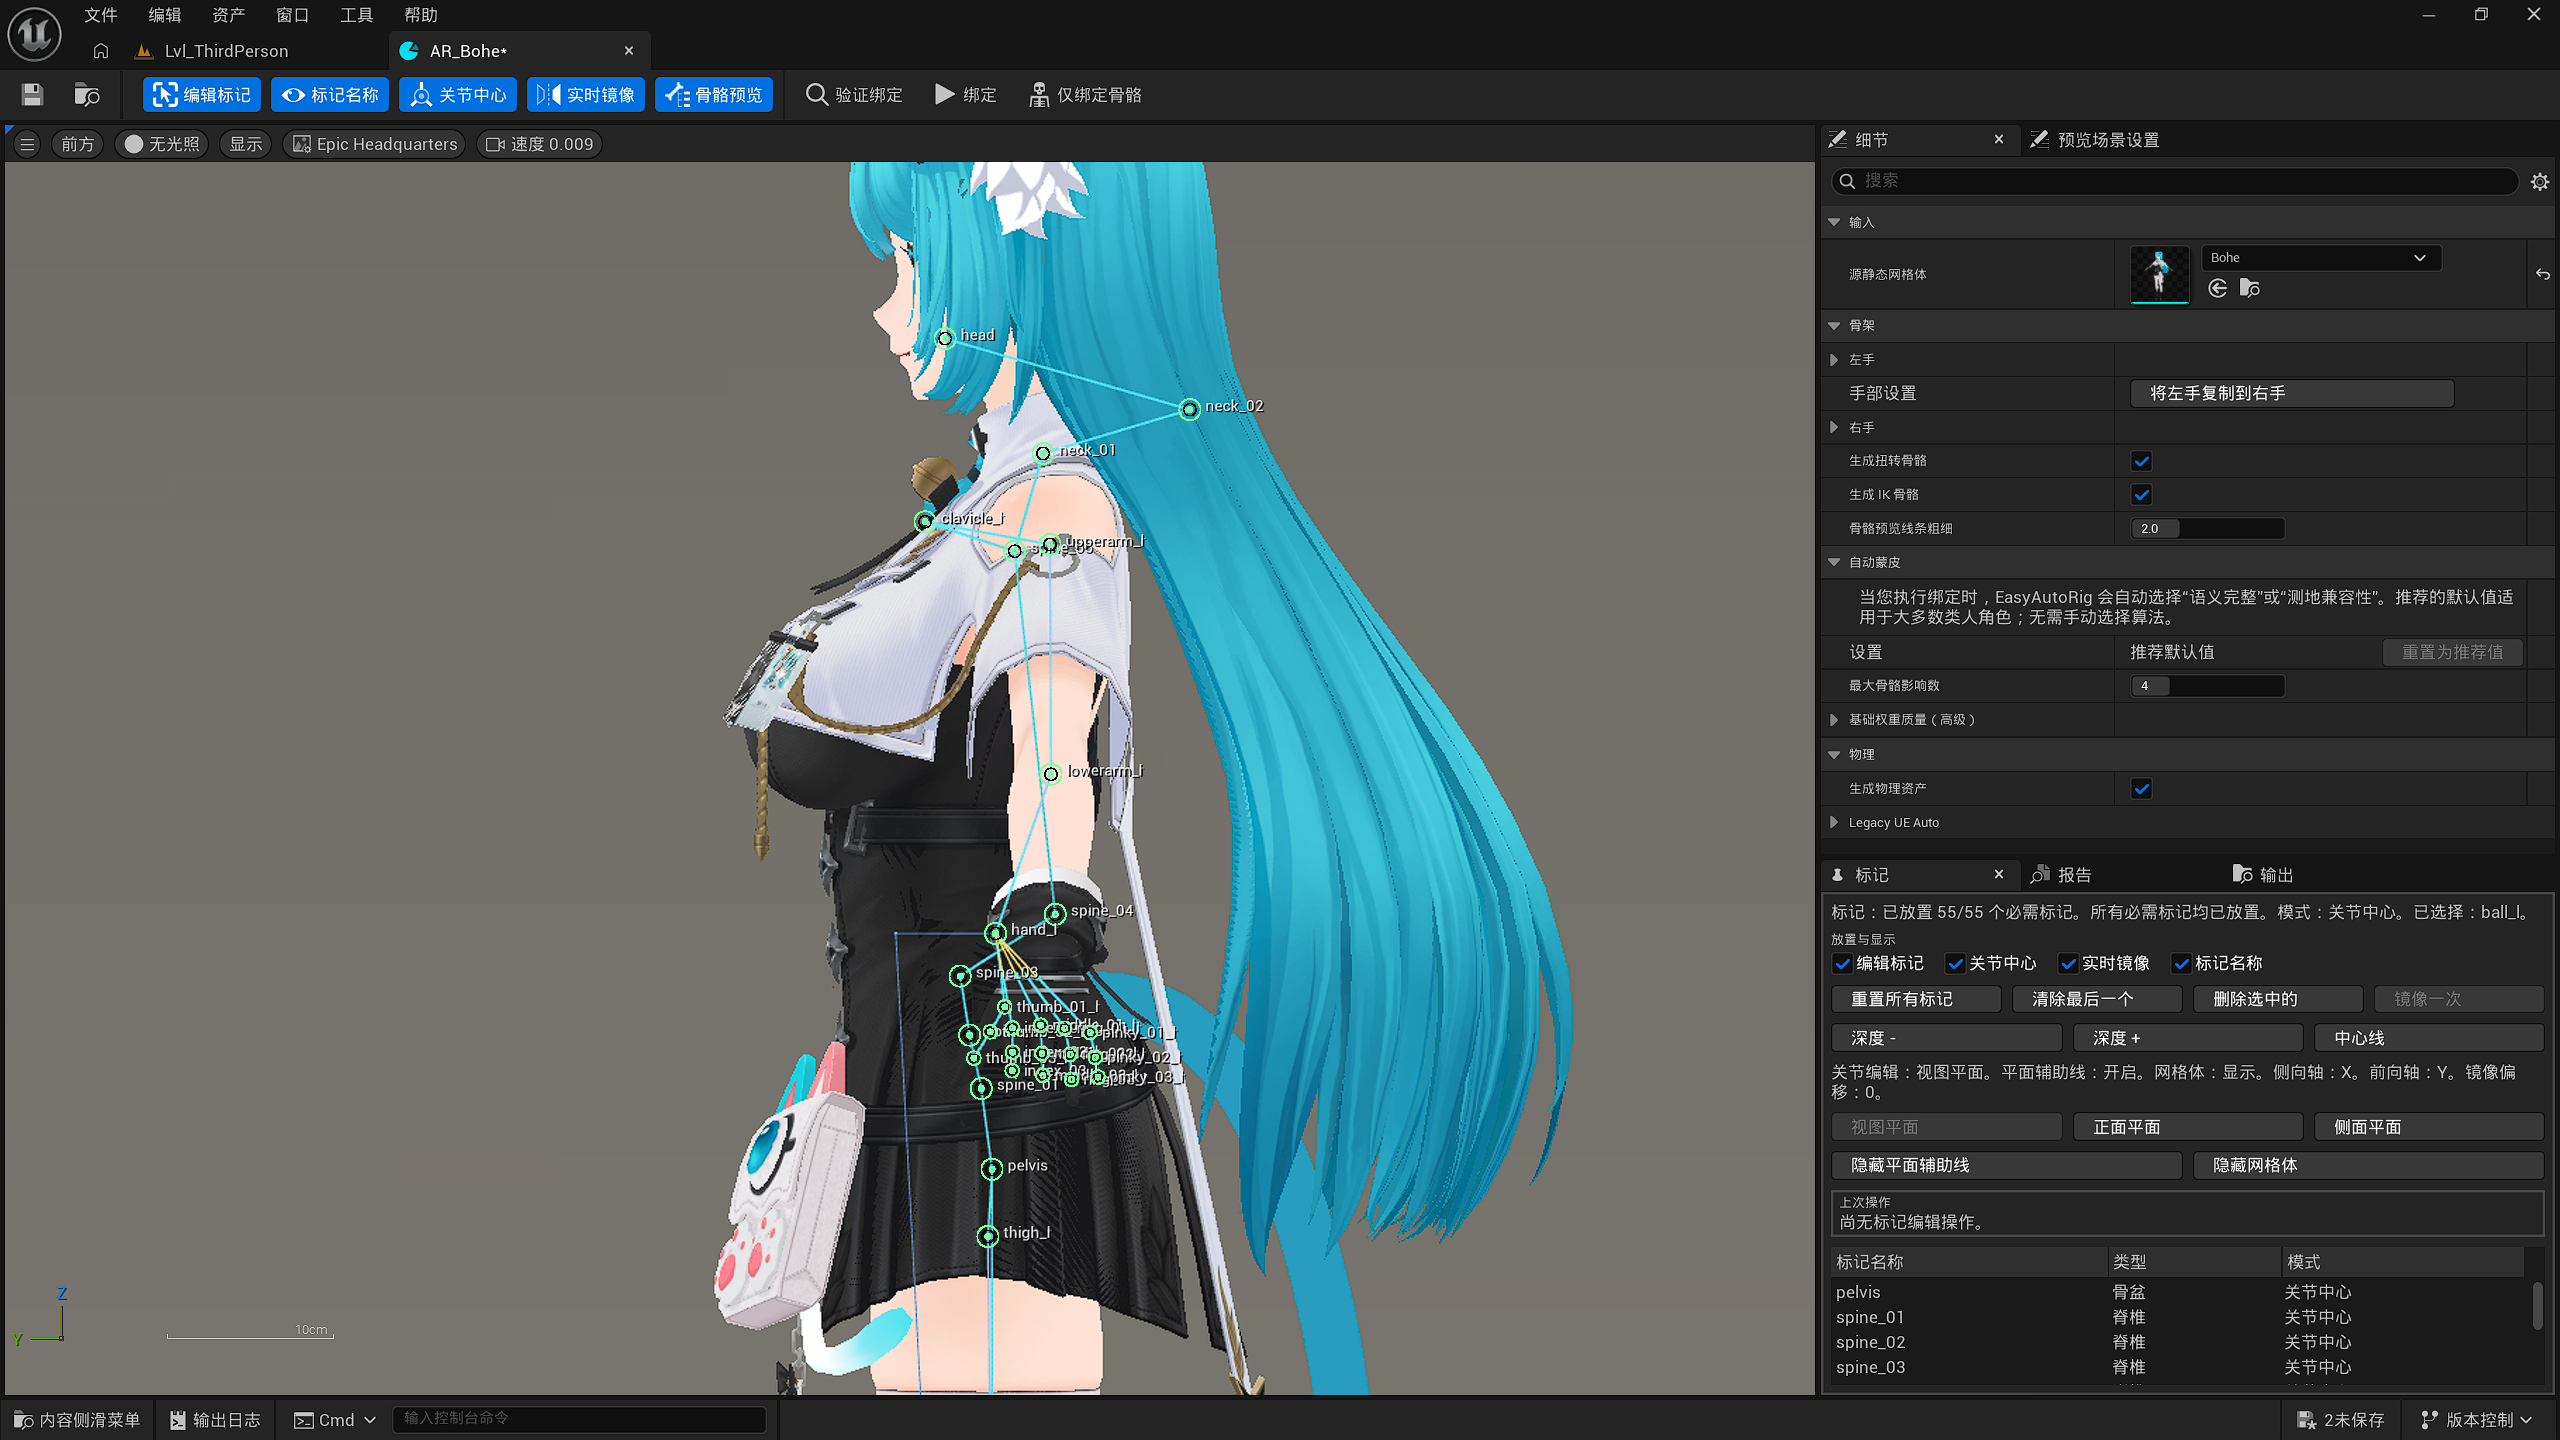
Switch to Front view. You may notice that some Landmark positions need adjustment.
Drag the Landmarks directly to reposition them.
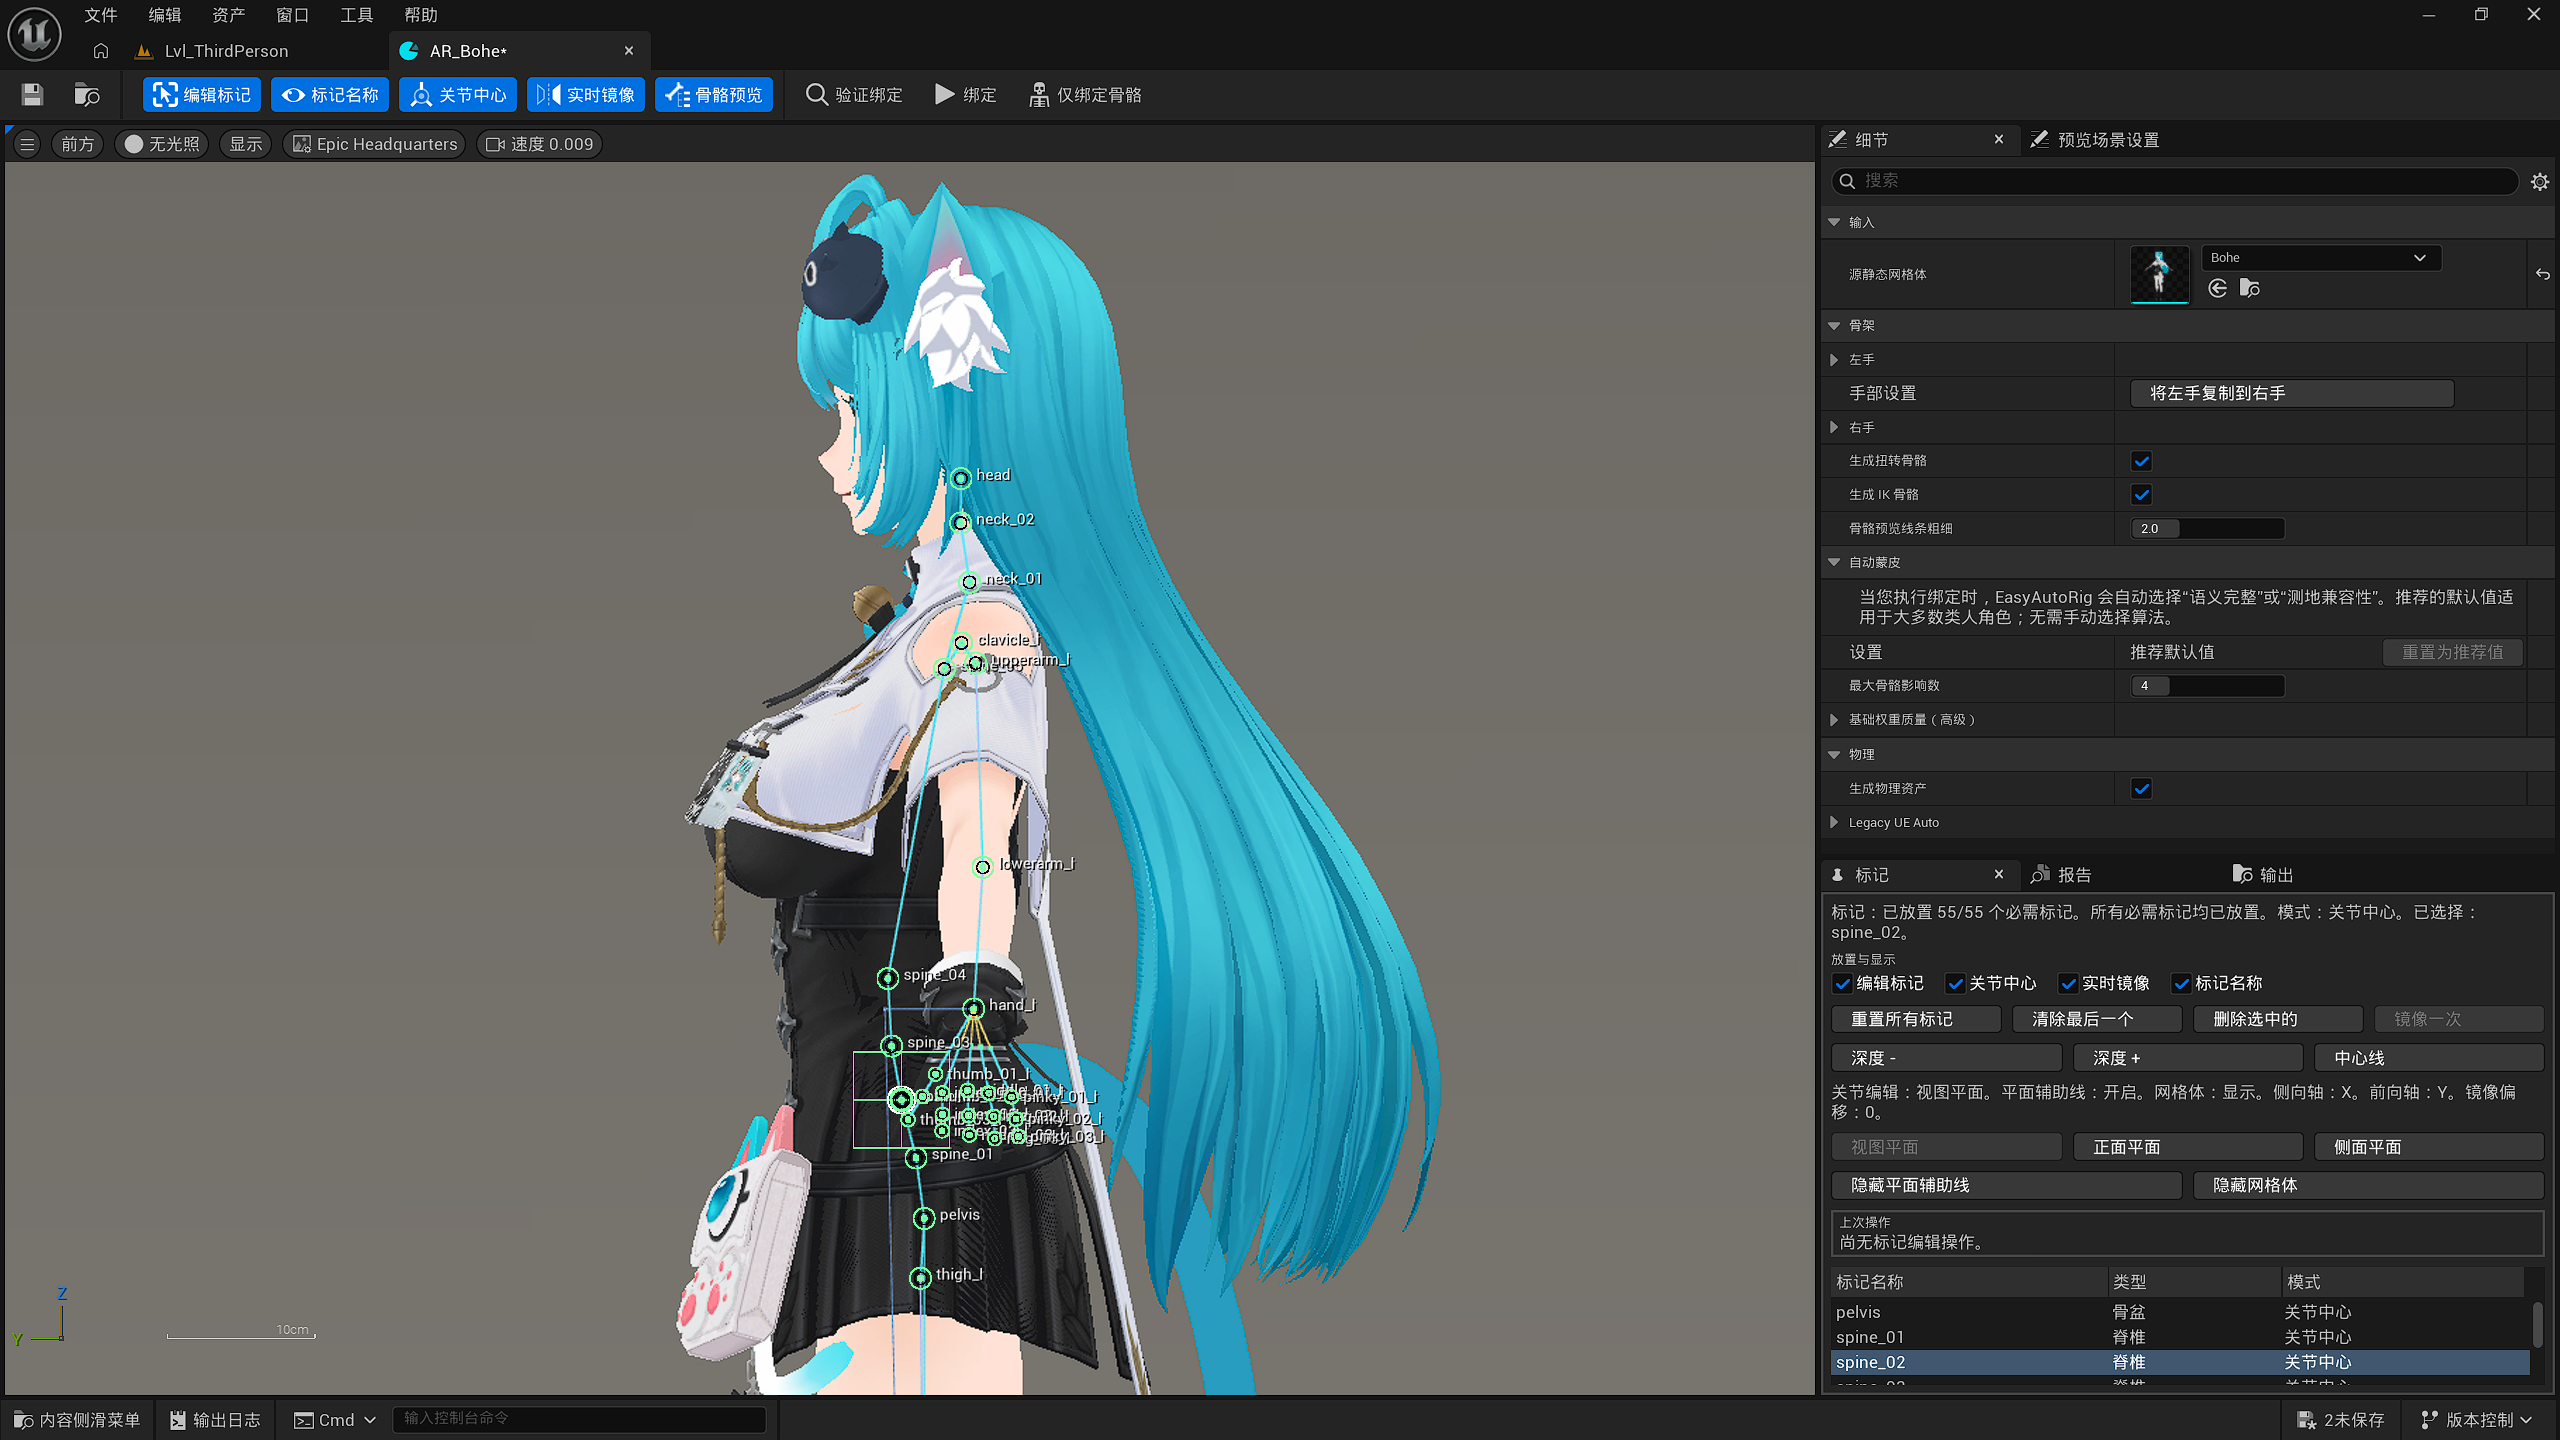
After adjustment, the result should look similar to the image below.
4.4 Validate Rig
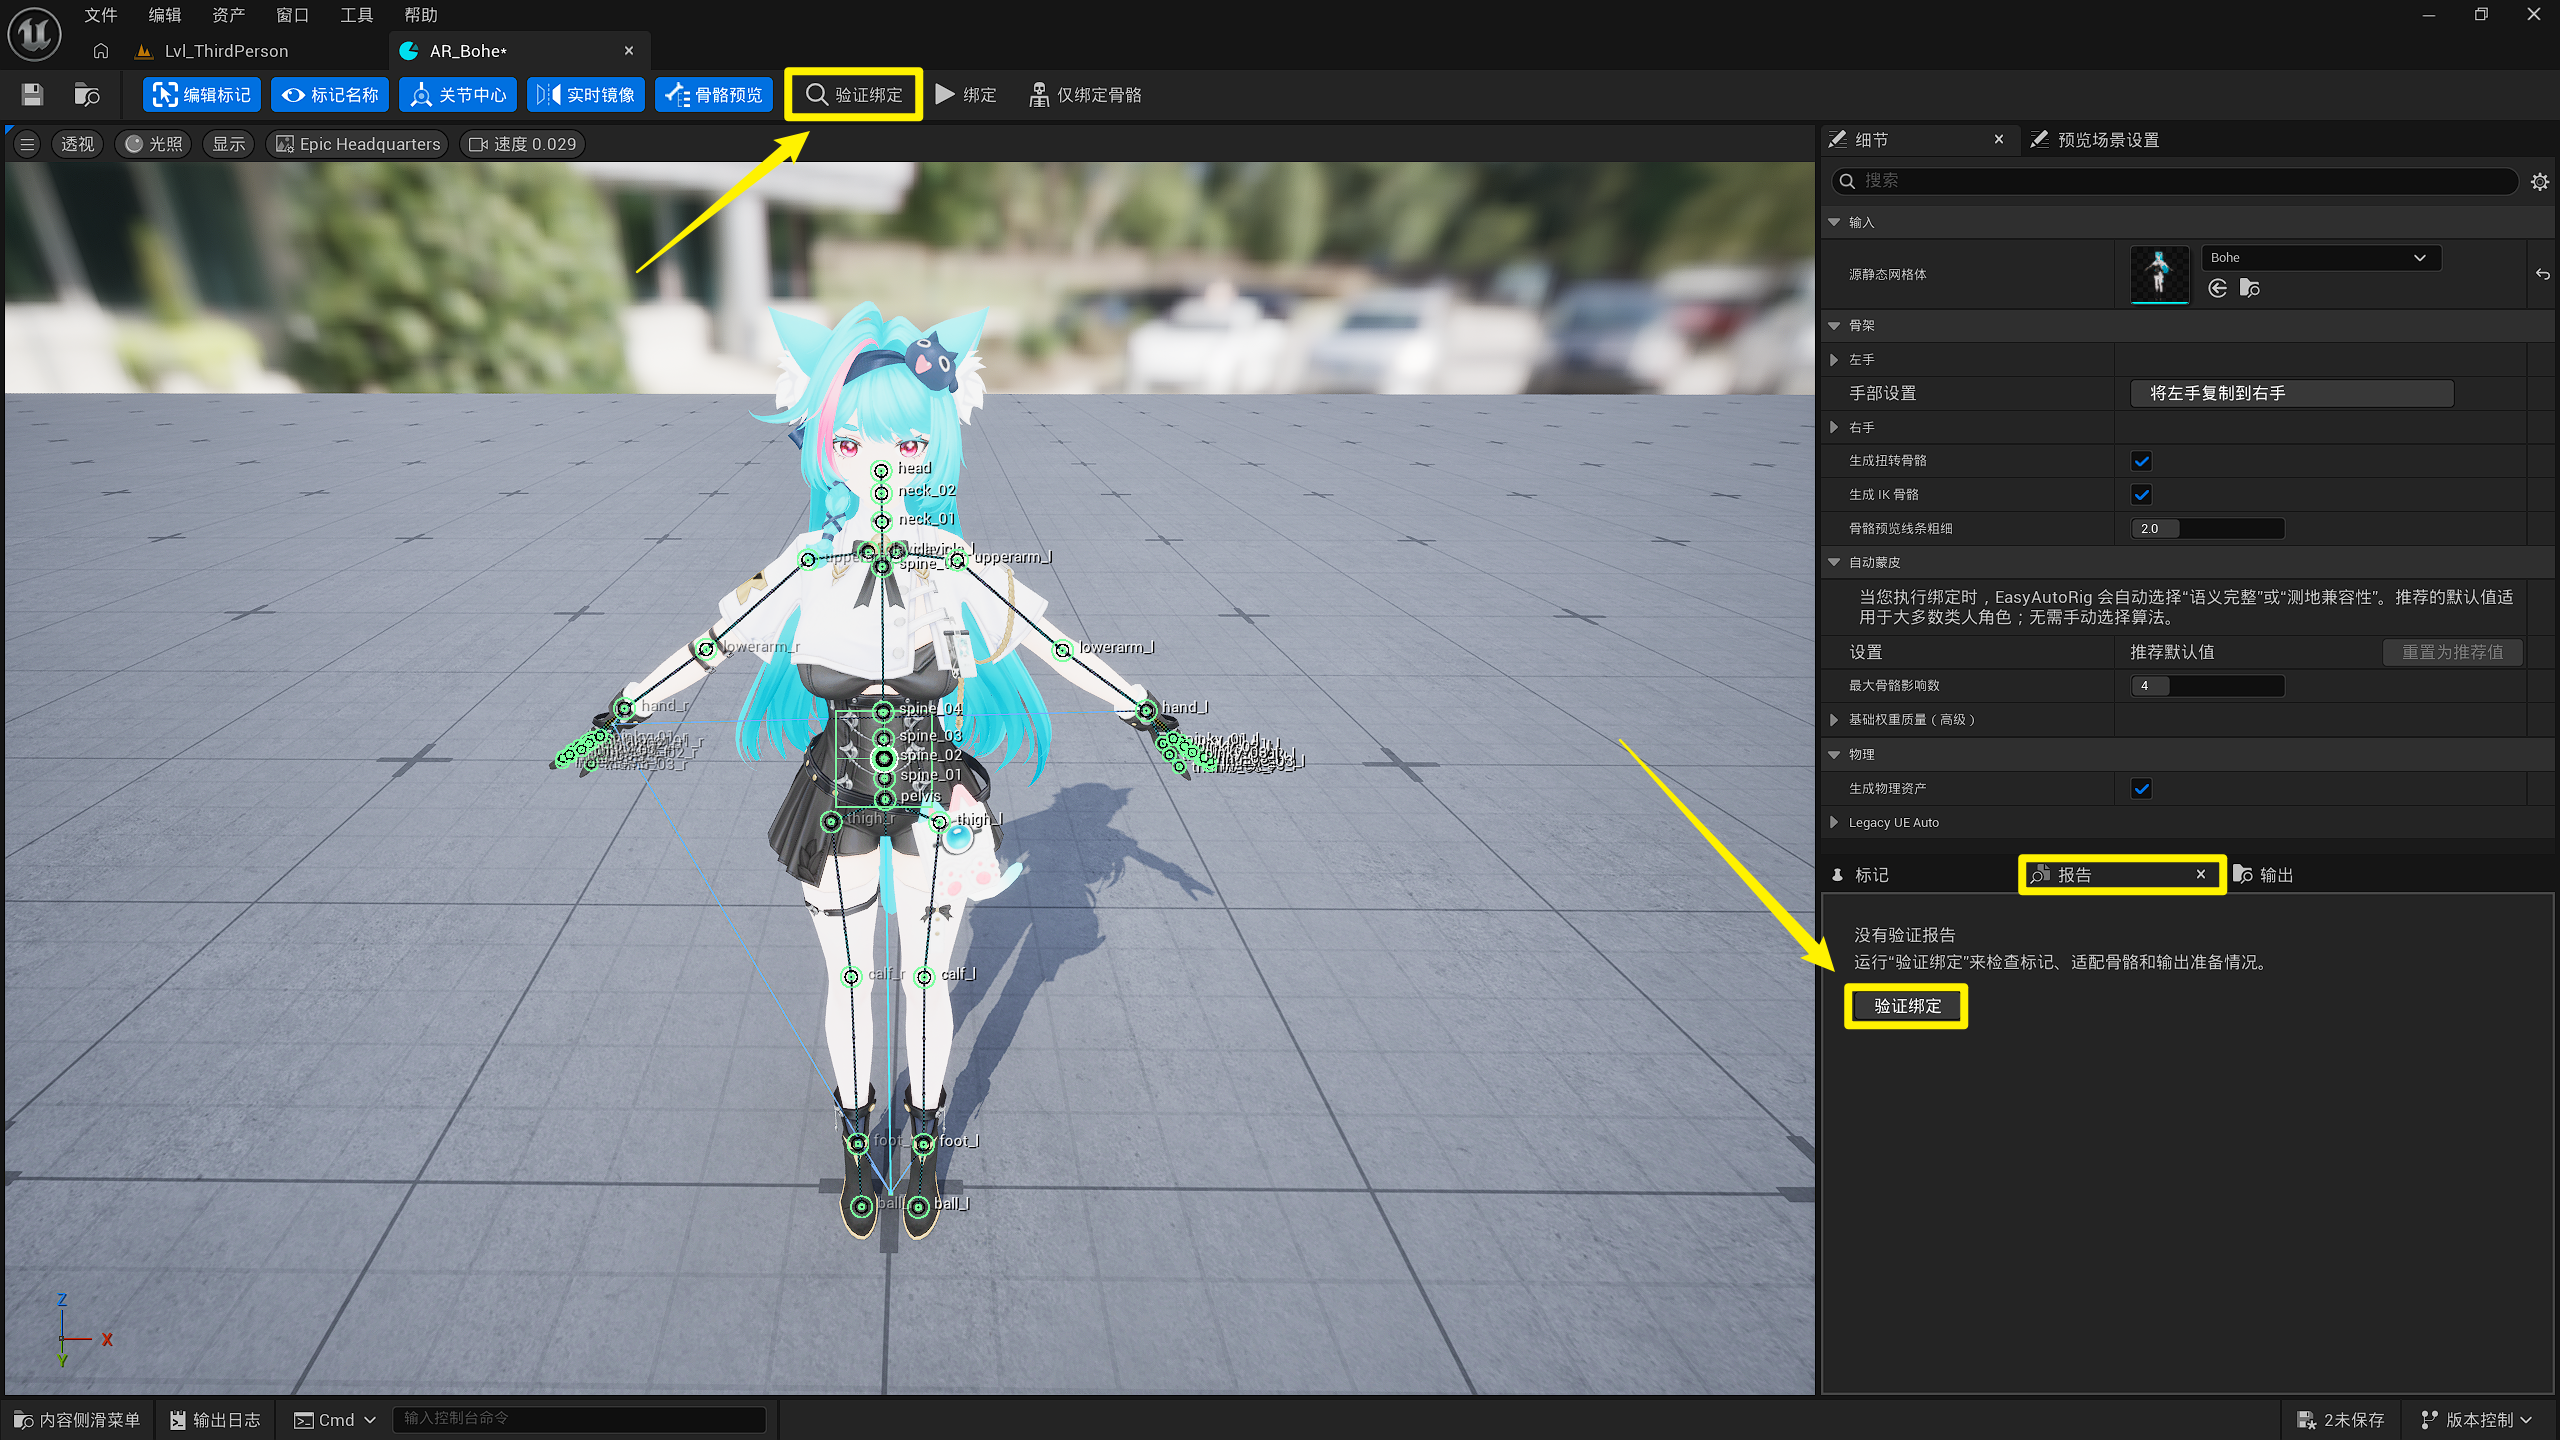
Click Validate Rig to view the current model’s pre-rig validation result.
The validation information tells you whether the model can continue to Rig, whether there are warnings you should review, and which automatic skinning method the plugin plans to use.
If the result says the model can continue, you can run Rig.
One point is worth emphasizing again:
Passing validation means no issue has currently been found that blocks the rigging workflow. It does not mean the final automatic skin weights are guaranteed to require no manual inspection.
After Rig, you should still test the main joints with actual animations.
If the current model is not suitable for automatic skinning, you can use Skeleton Only as the final fallback. This generates the UE5-style Skeleton first, after which you can paint the weights manually from scratch.
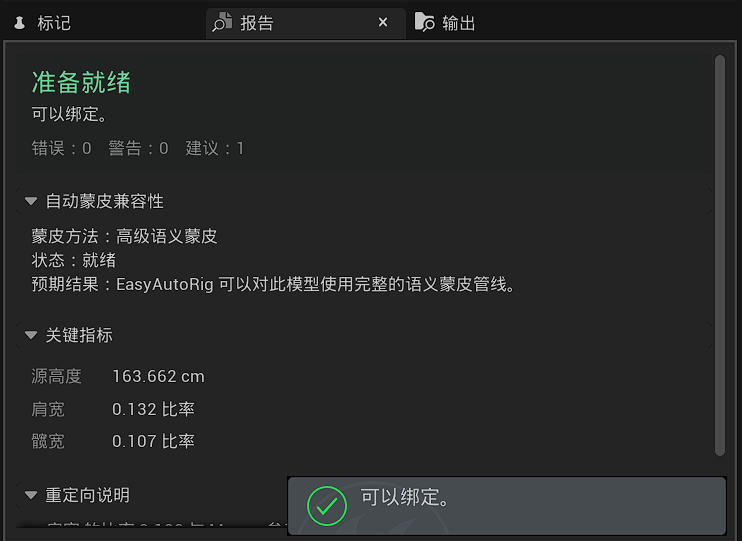
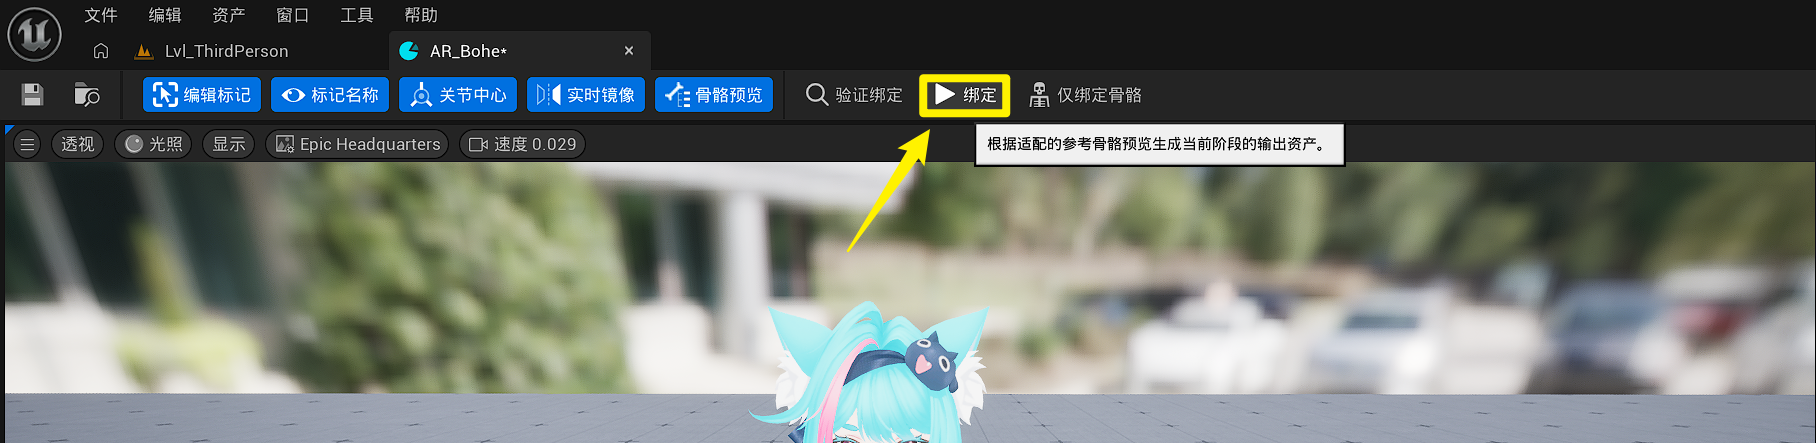
4.5 Click Rig
Now click the Rig button and wait for the rigging process to finish.
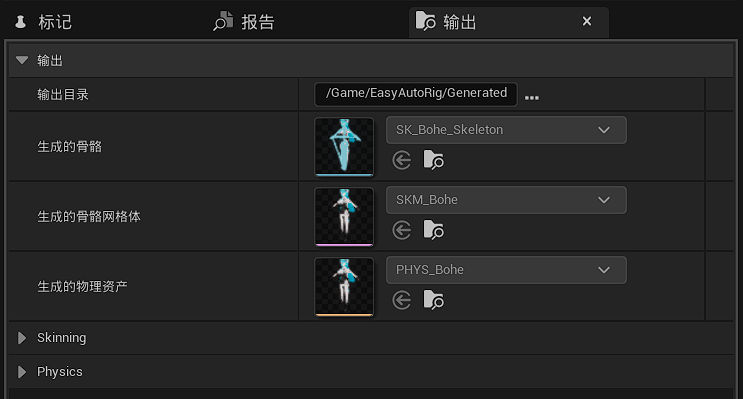
After completion, you can see the generated assets in the Output panel. You can also customize the output directory.
5. Result and Follow-up Checks
The model now has a UE5-style Skeletal Mesh and automatically generated initial skin weights.
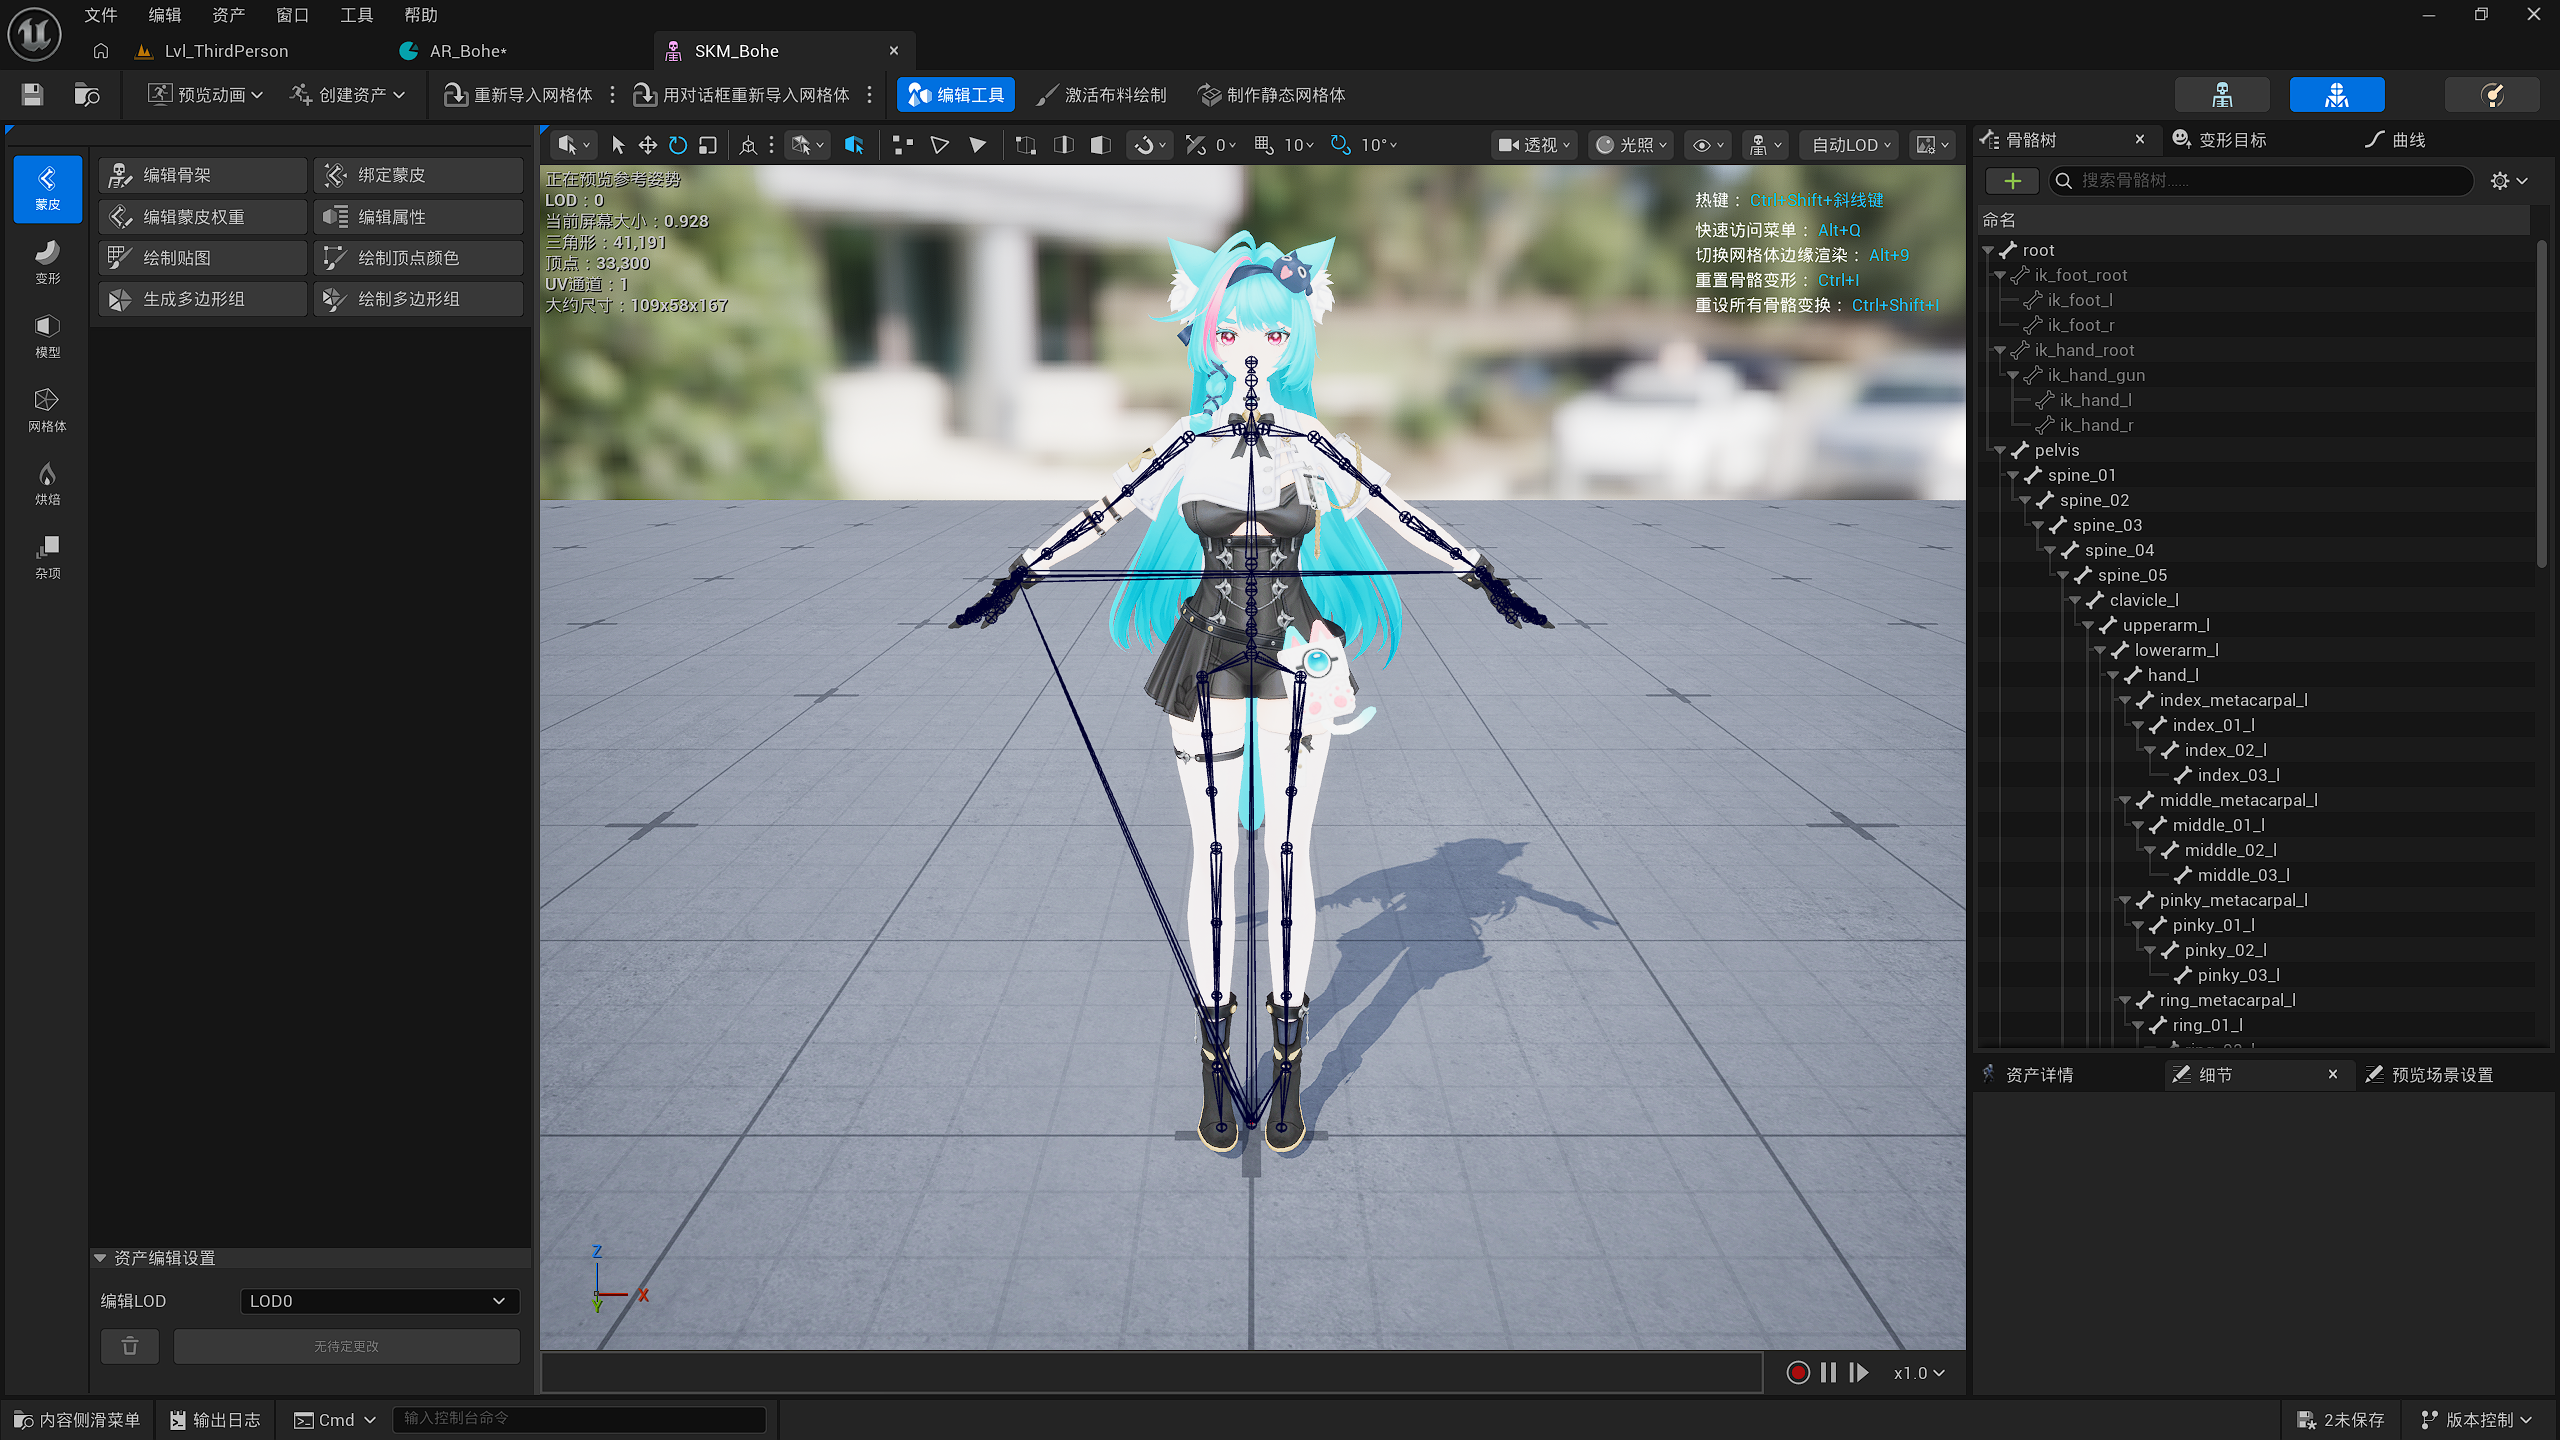
Do not stop at confirming that “Rig succeeded.” It is recommended to play several representative animations and check:
- Whether the shoulders deform naturally when raising the arms
- Whether the elbows deform correctly when bending the arms
- Whether the hips collapse noticeably when raising the legs
- Whether the knees behave correctly when bending the legs
- Whether fingers, clothing, hair, and other special areas need further adjustment
If these areas already meet the needs of your current project, you can continue using the result directly.
If some areas do not deform well enough, treat the automatic weights as a starting point and refine only the regions that actually need work. This will usually still save a significant amount of time compared with building the entire skeleton and painting all weights from scratch.
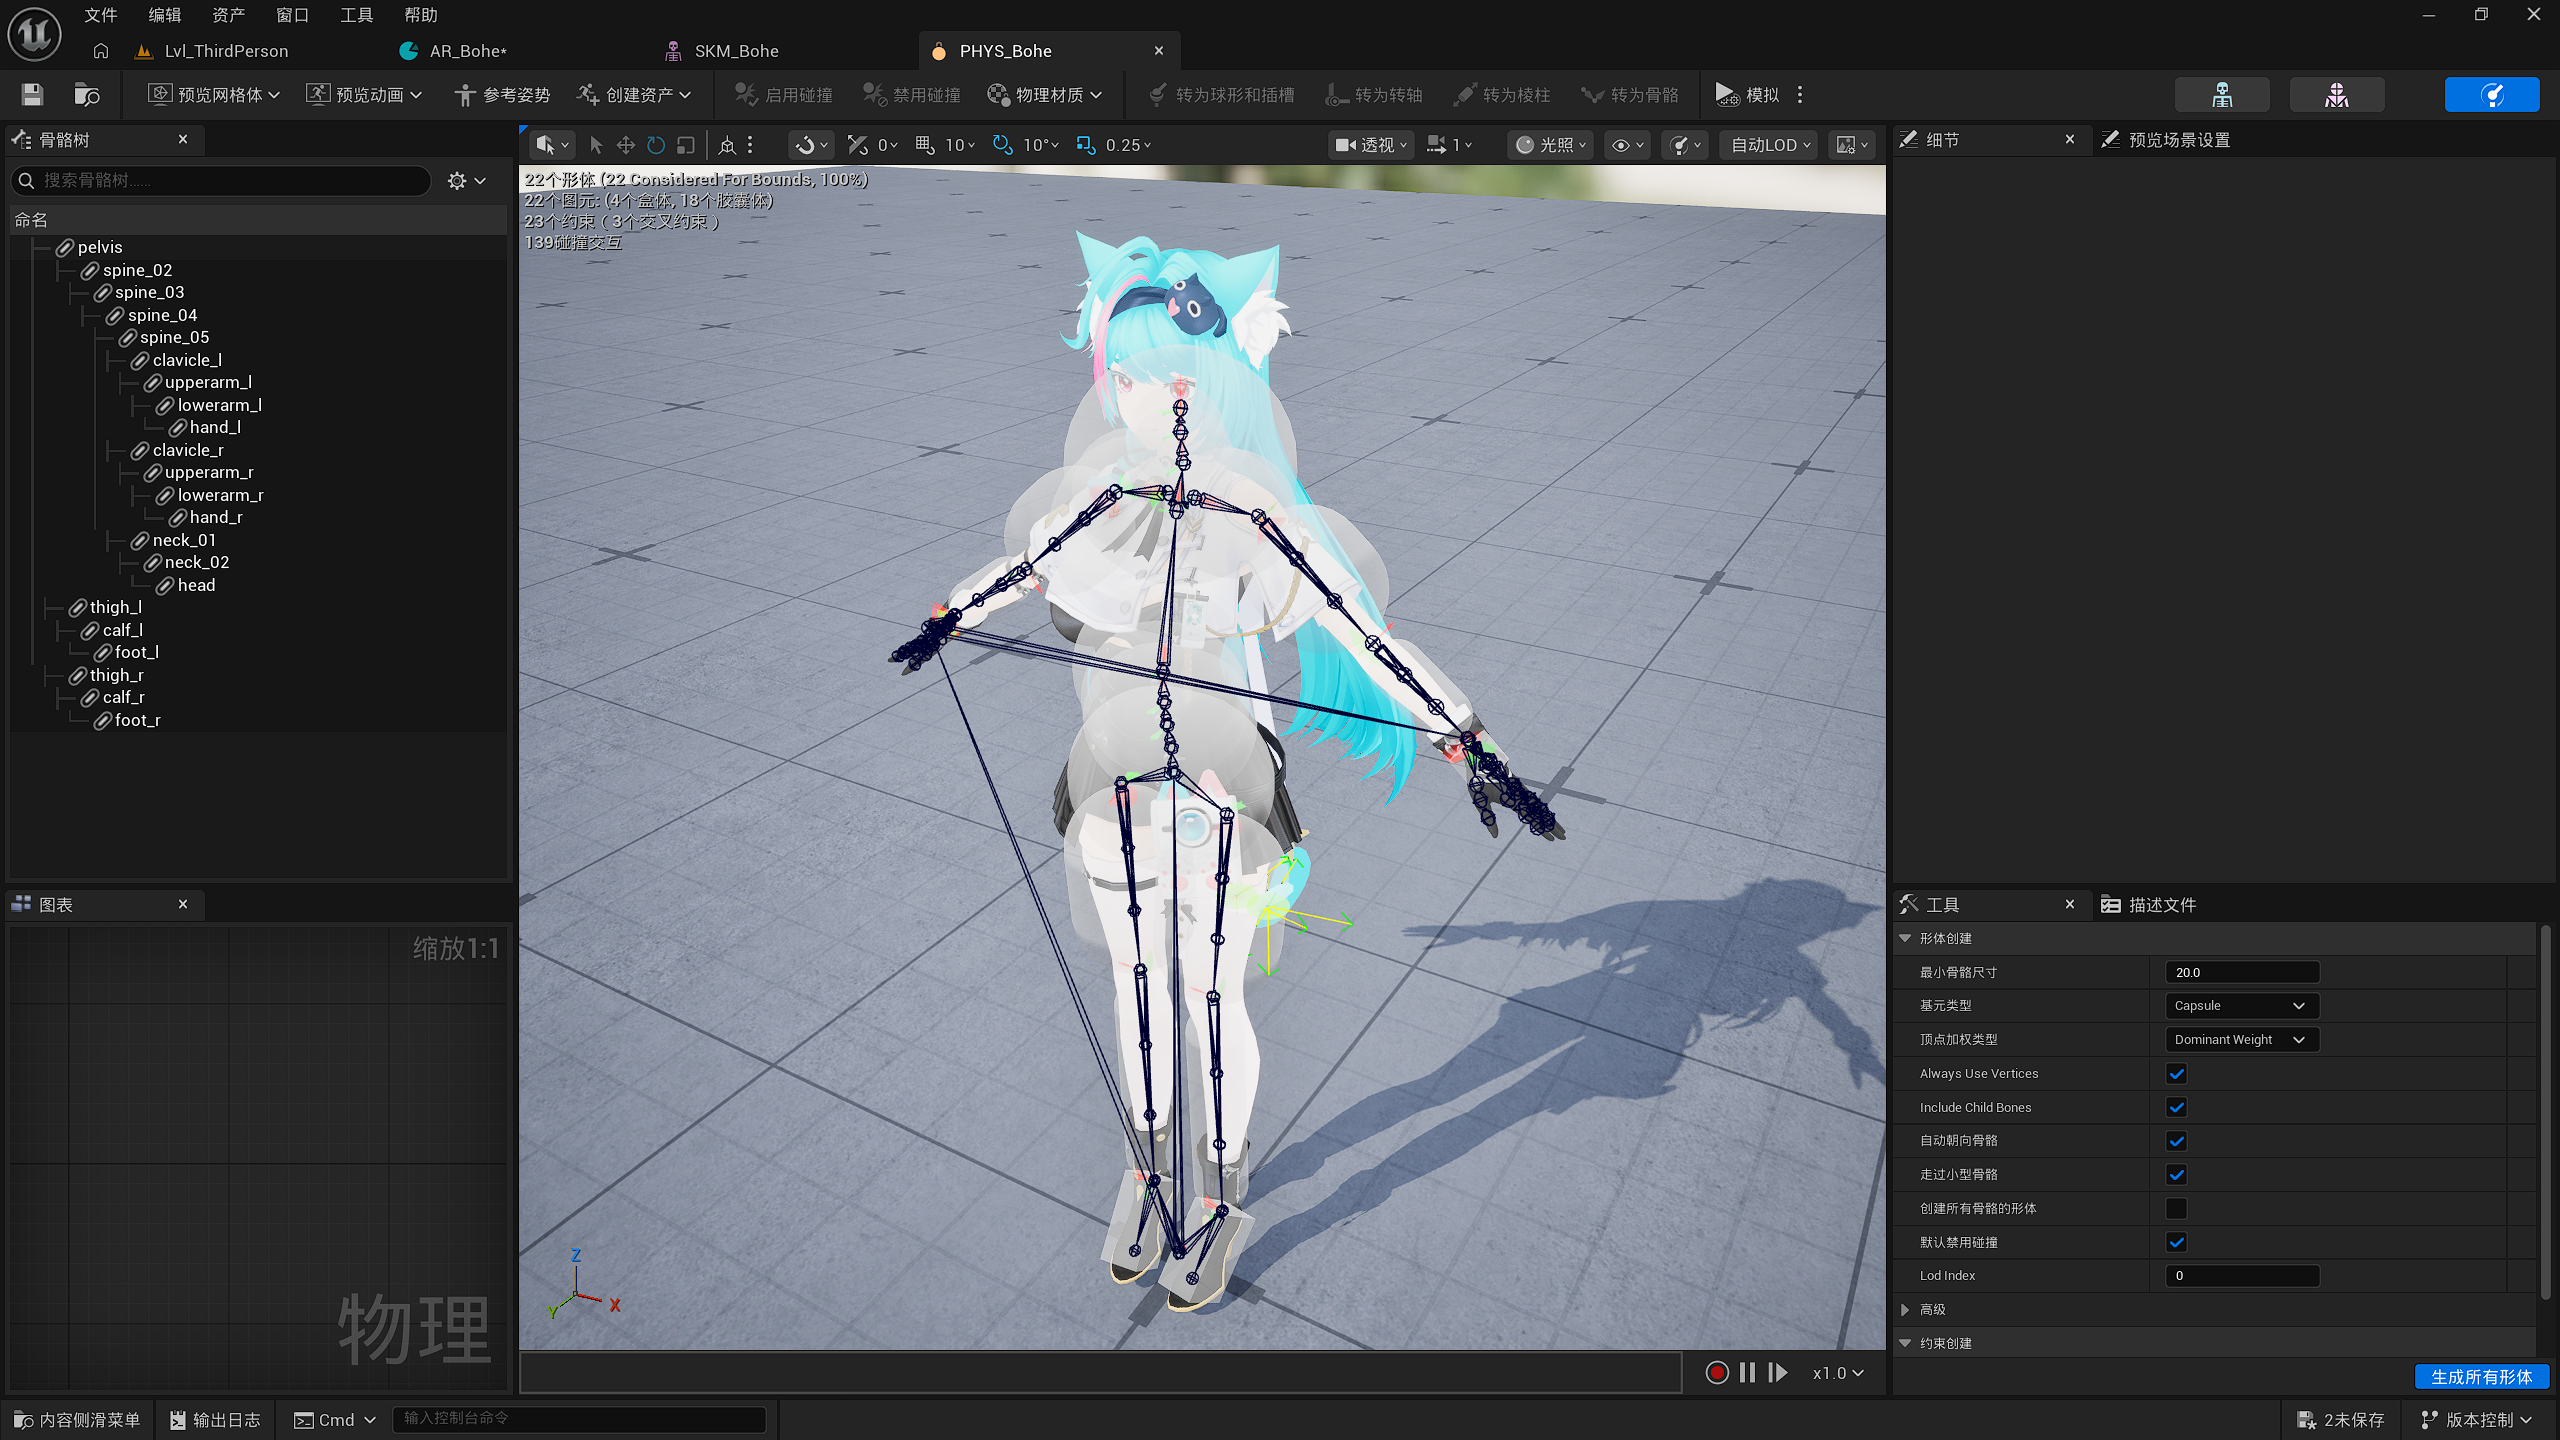
EasyAutoRig also generates a Physics Asset intended to provide a practical starting point for game development.
You can click Simulate to inspect the physics behavior. If the result is not ideal, adjust the position and scale of the rigid bodies according to the character’s proportions, and continue testing based on your project’s requirements.
The recommended mindset is:
EasyAutoRig helps you get from 0 to 1 quickly and get the character running in your game as soon as possible. How far you refine the final deformation quality depends on the needs of your project.